
Woven Berry Basket, is an improvisational block based on the traditional basket weave design. It uses a free form cutting technique (cutting without a ruler).
The goal of this tutorial is to introduce you to this technique. There are two main principles that I use in improv piecing:
- if it is too short, add on
- if it is too long, cut it off
Your block will not be exactly like mine, but I will describe aprocess that you can use to make one that is similar in design.
Tips for improv piecing:
- A rotary cutter with a 60mm blade is my preference for free form cutting
- Set the stitch length on your machine a little shorter than usual
- Cut 4 strips 5 in x 18 in (approx) Here’s your first chance to cut without the ruler!

2. Free hand cross cut strips that vary from about 1 in – 2 .25 in width from each strip

3. Stitch 9 pairs of strips together, varying the colors and widths.

4. Press seams to the darker fabric

5. Add a third strip to each set, again varying the color placement and width of strips.

6. Lay out the 9 units in an alternating vertical, horizontal pattern.
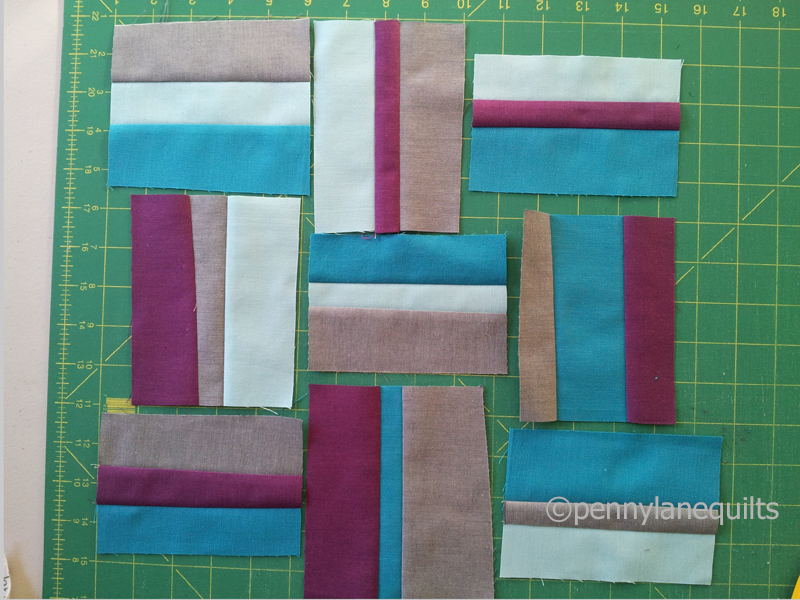
*At this point, you will need to start making decisions based on how your units are sized. I will attempt to describe how I solved the puzzle.
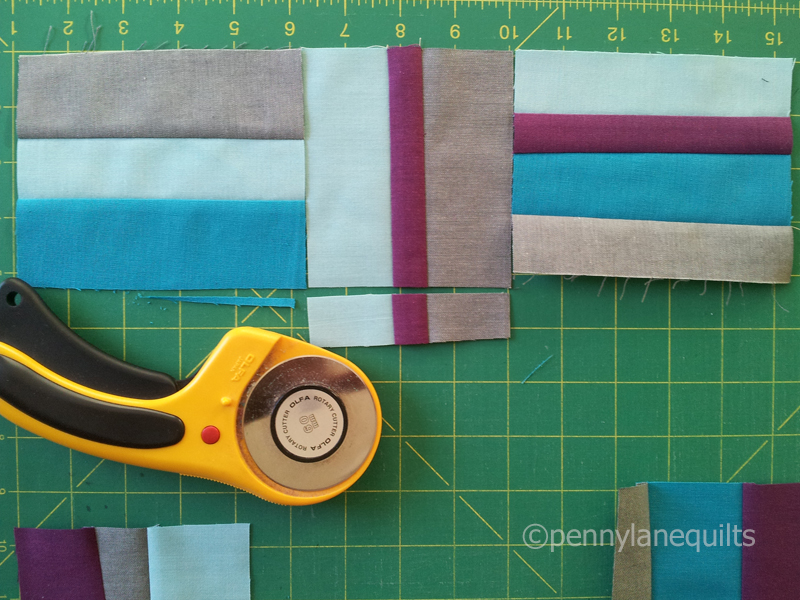
For the first row, I decided to cut the bottom off the middle unit, and add a strip to the third unit.
I followed the same procedure for the second row:

But when the units were assembled, the second row was shorter than the first, and I was aiming to have each row approx 13 in wide so that I would be able to trim it down to 12.5 in. What to do? Add on!

To assemble the rows, I trimmed the top edge of the second row, then overlapped it onto the bottom of the first row (right sides facing up). Using that cut edge as my guide, I trimmed the bottom of the top row to match.

Follow the above procedures to assemble the third row and attach.

If your block is big enough, just trim to 12.5 in square and your block is complete. If it is too small, improvise! You might add some strips to form a frame, and then trim.

Here is my finished block: The thing I like best about improvisational work is that you are engaged making design decisions throughout the process. *Warning: this may be addictive! As I work, I find myself asking lots of “What if?” questions:
What if I cut the strips wider or thinner?
- What if I used 5 colors?
- What if I used 2 colors?
- What if it was scrappy?
- What if the units were smaller and I made a 4 x 4 grid?
I hope you will give this a try and enjoy the process as much as I do.
