Category Archives: hand quilting

Squircle Party

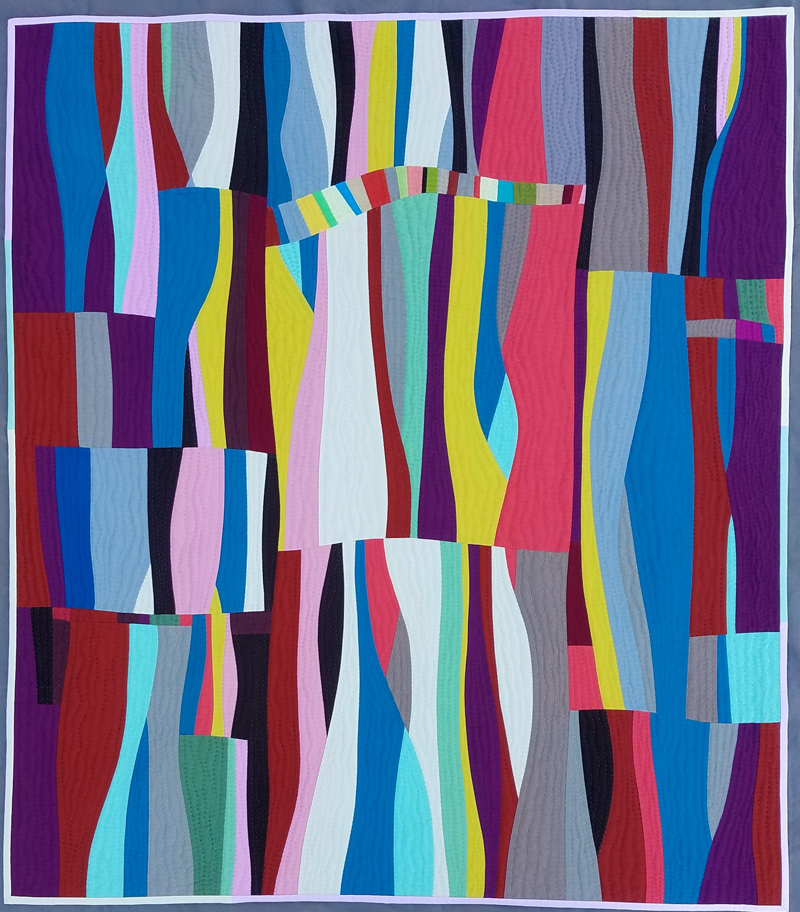
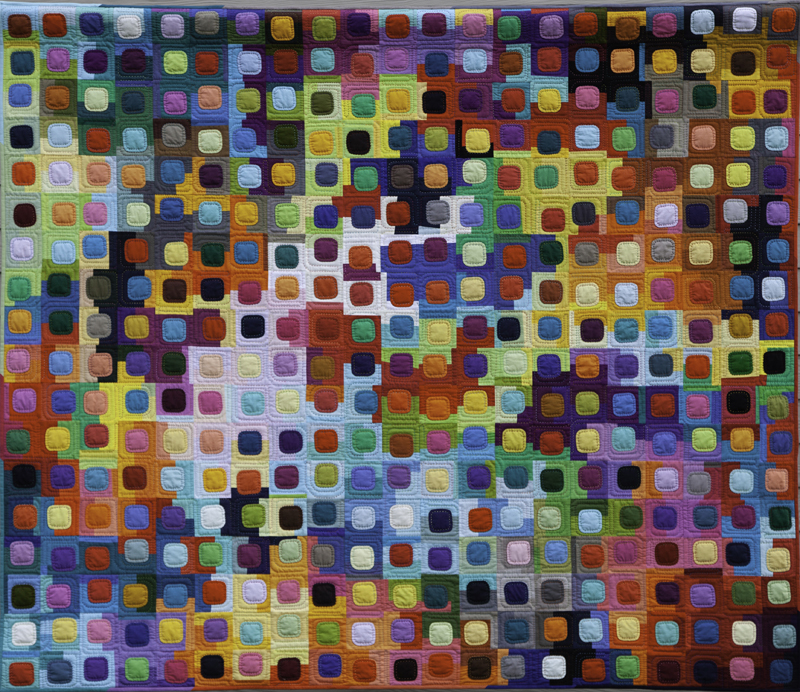
Squircle Party was completed in October, 2023, just in time to make the QuiltCon entry deadline.

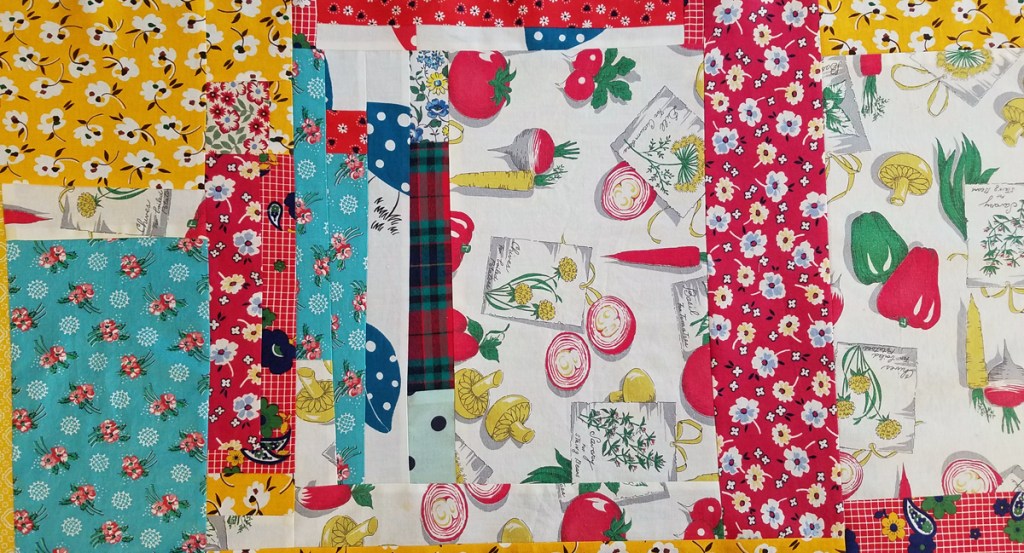
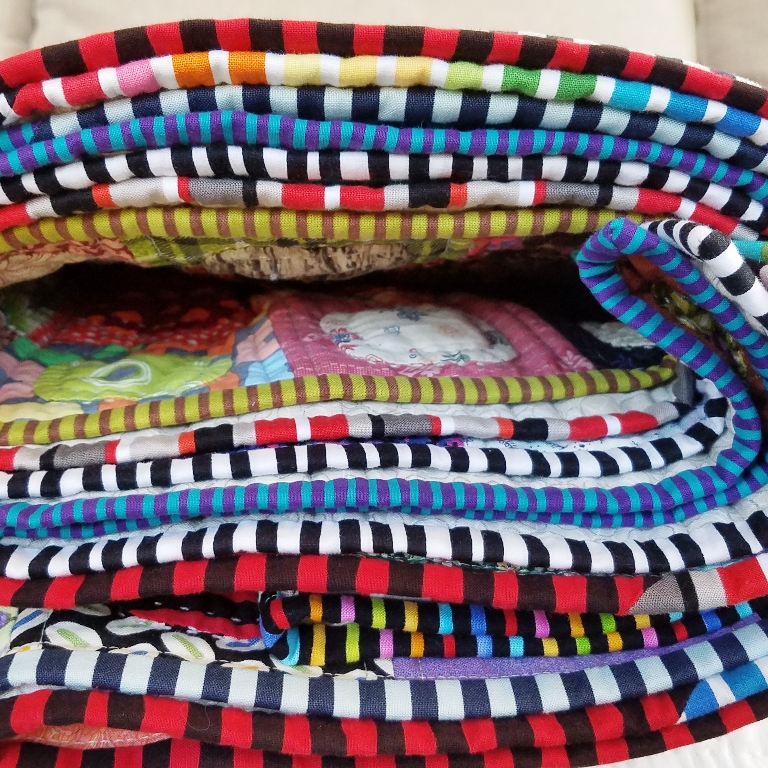
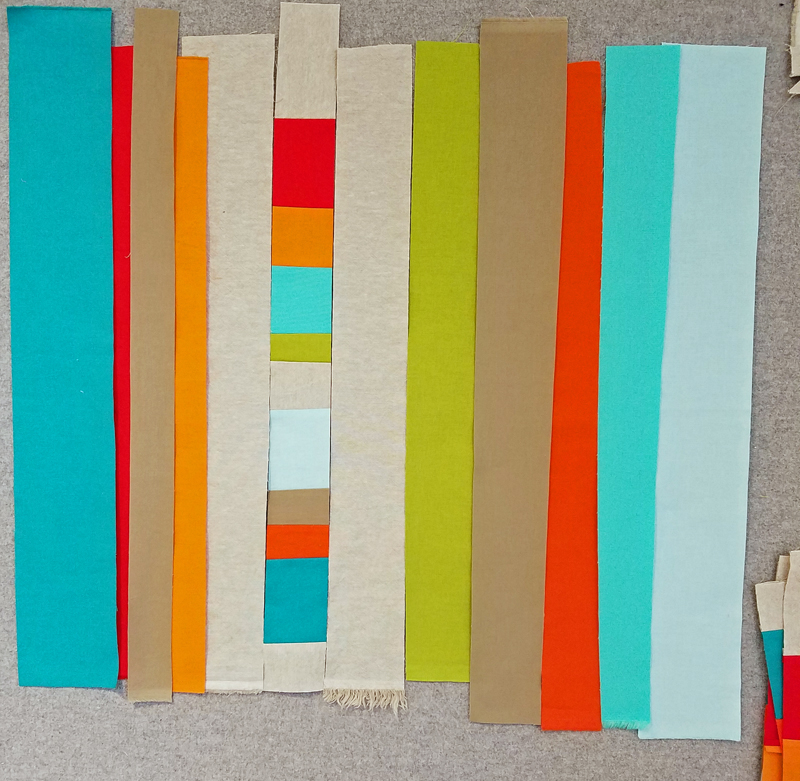
It began with a bag of print scraps inherited from a friend and an overflowing basket of solid scraps of my own.

While thinking about possible ways to piece them together, I remembered seeing a fabulous, scrappy quilt by Karen Duling at QuiltCon 2022 with the clever title “Languishing Looks Like This”. You can find it and other wonderful quilts in her gallery. Karen cut all her scraps a consistent width, but mine vary between one inch and 2.5 inches. My goal was to leave each scrap its original width and length.

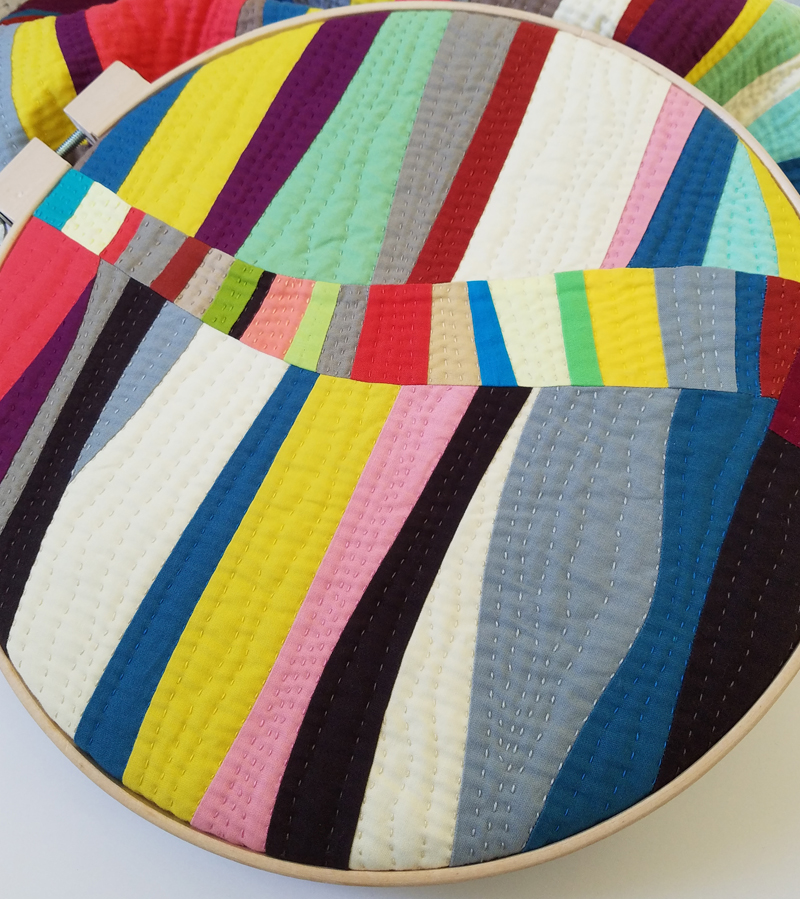
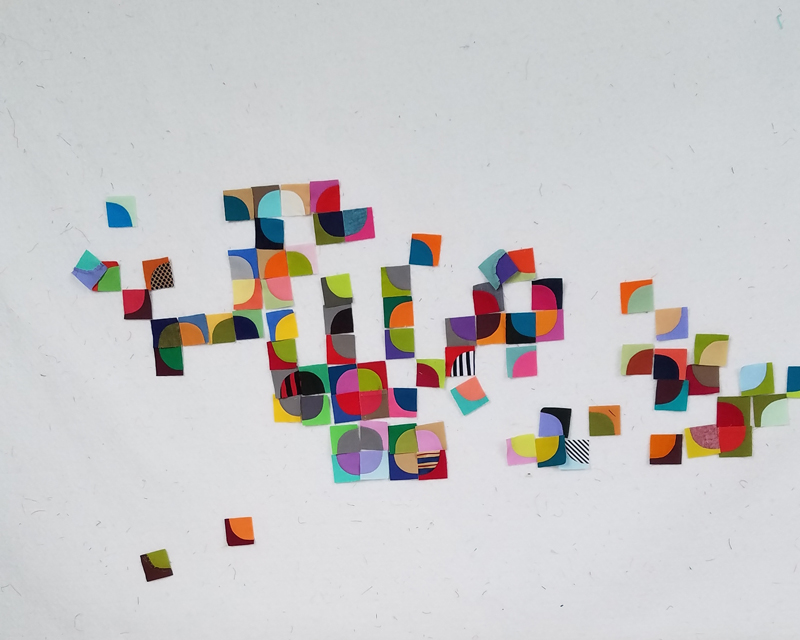
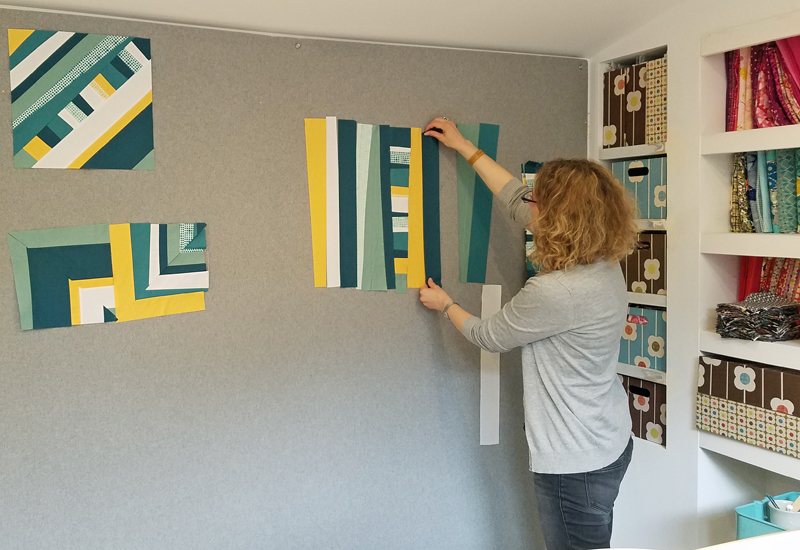
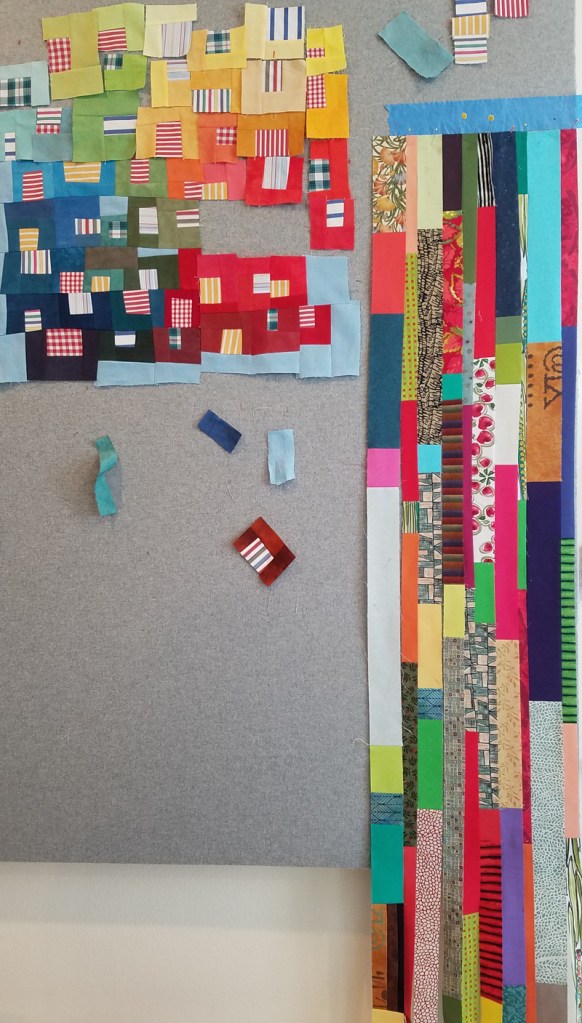
Piecing the strips provided a “leader/ender” opportunity while working on an improv pieced quilt. You can see the strips beginning to come together on the design wall with a wall hanging I was piecing simultaneously.

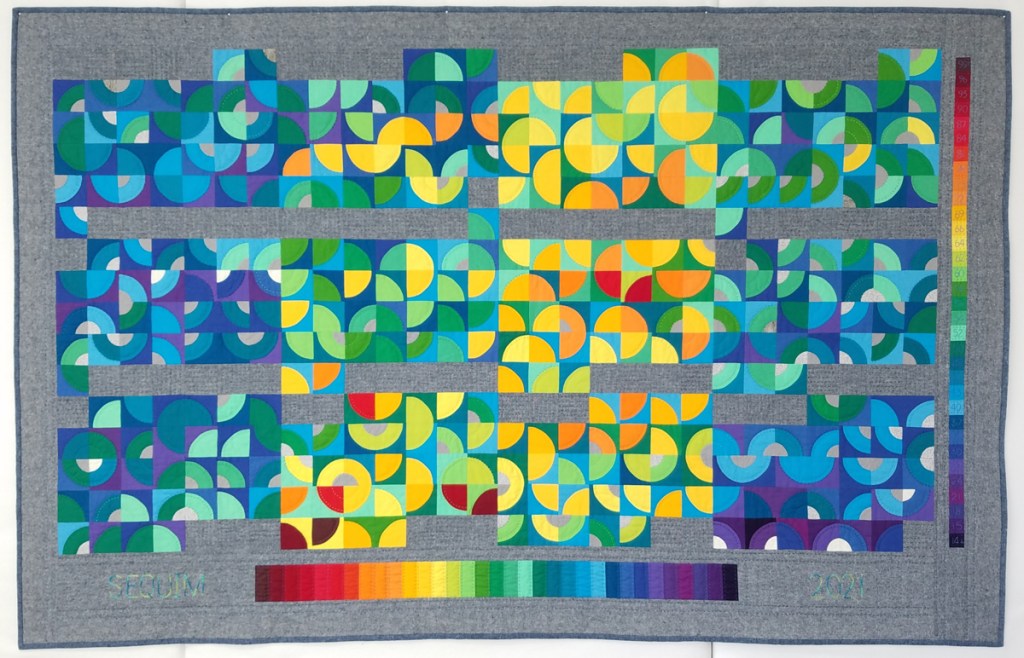
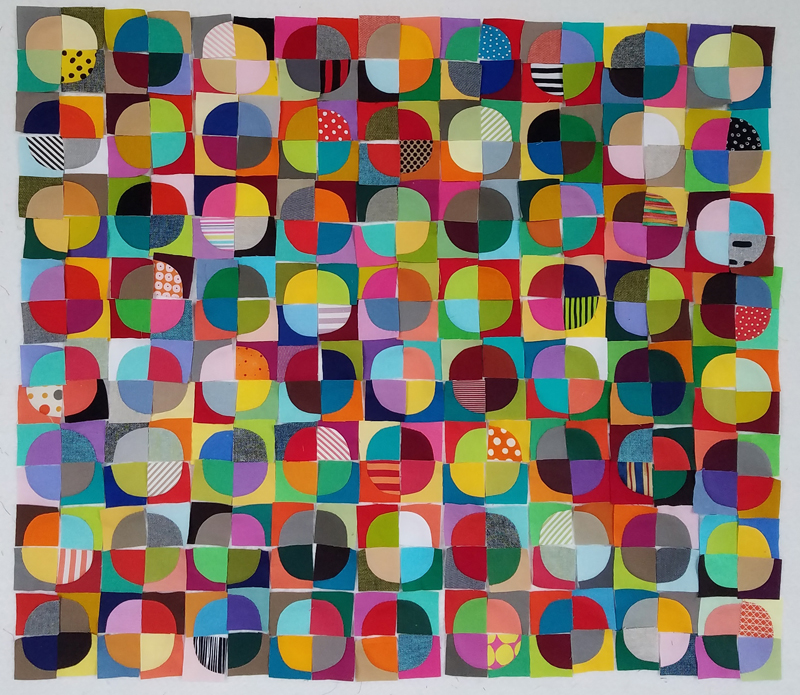
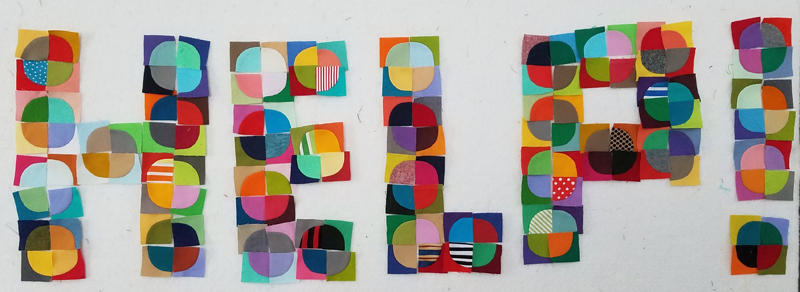
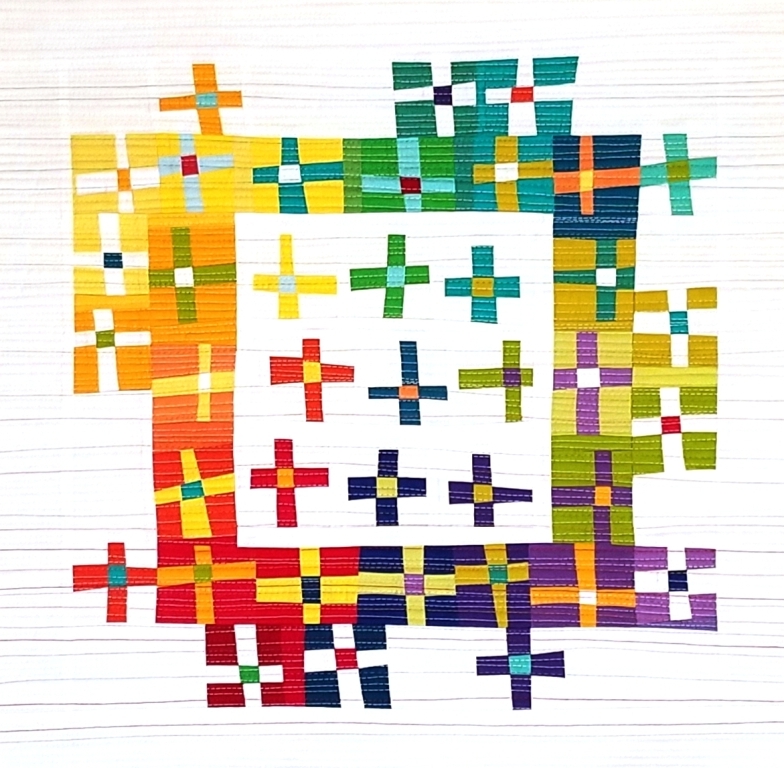
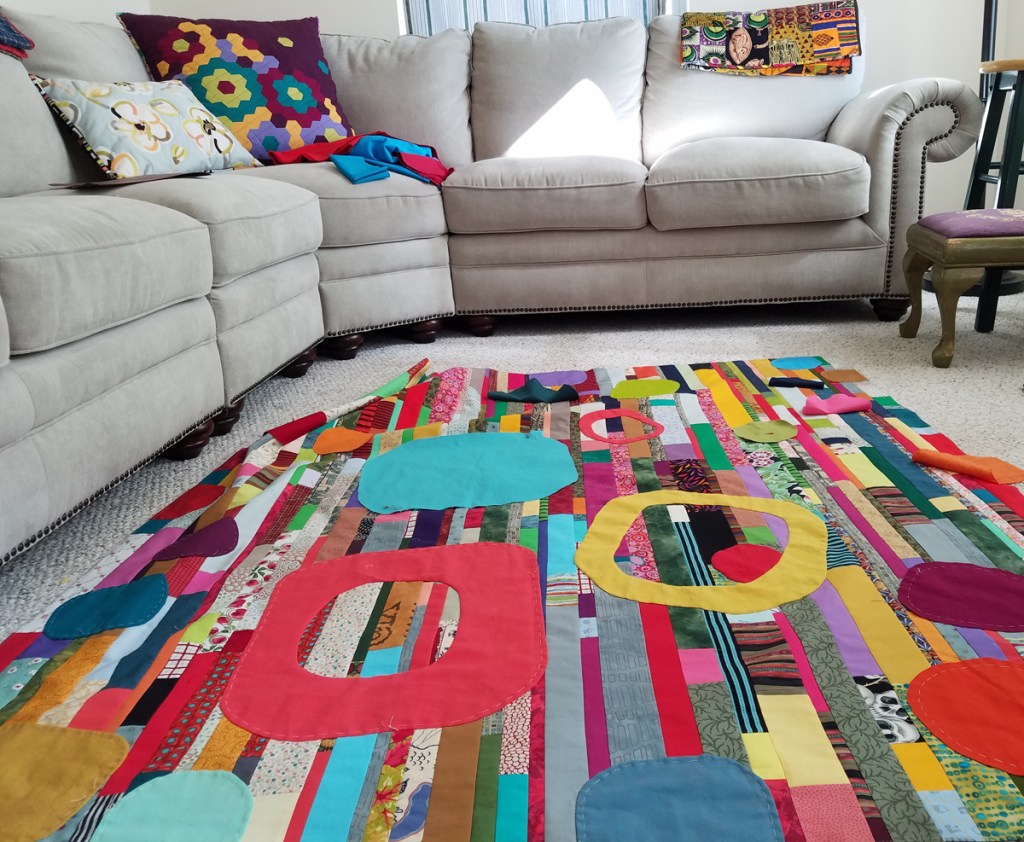
After piecing the strips, I began contemplating quilting plans. But while it was hanging out on the design wall waiting to be basted, I thought it might be fun to use the strips as a background and applique on large, colorful shapes. Squircles naturally came to mind. I cut the shapes mostly from linen and shot cottons and placed them randomly across the top.

Then I wondered what it would look like if I cut the center out of some of shapes.

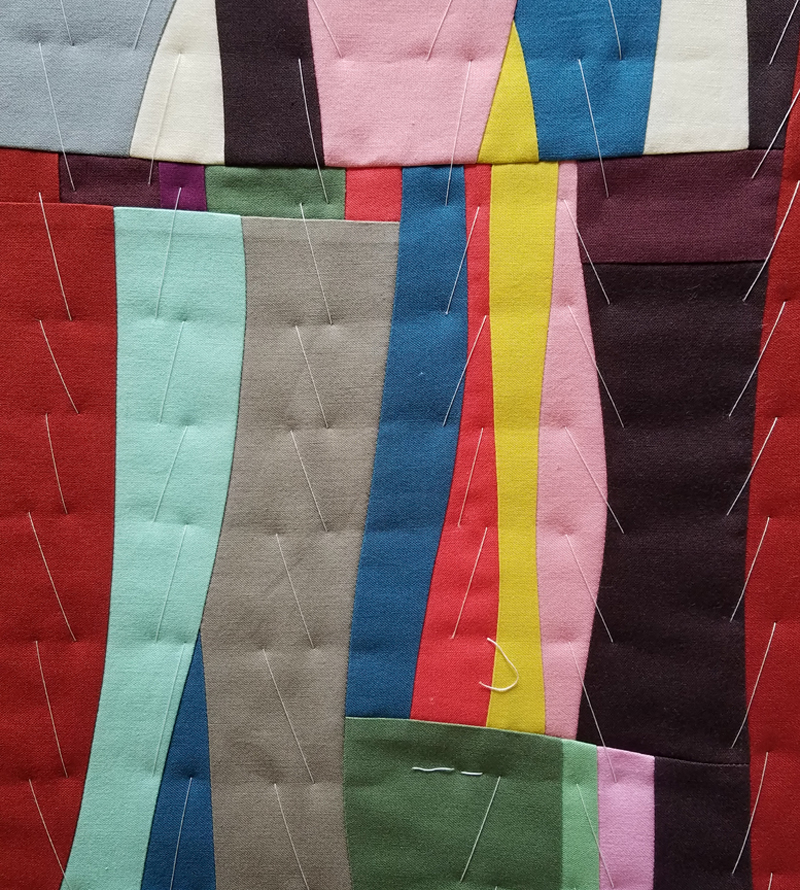
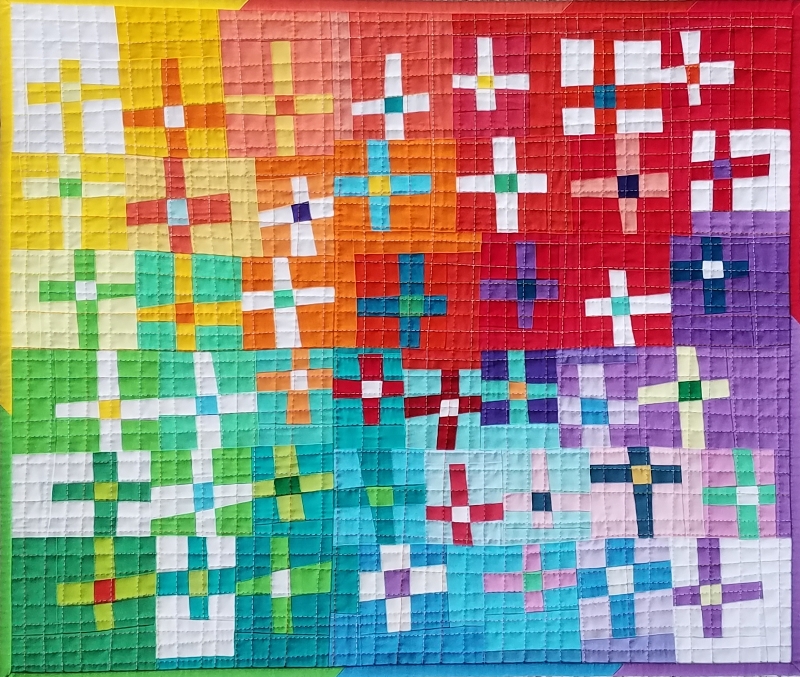
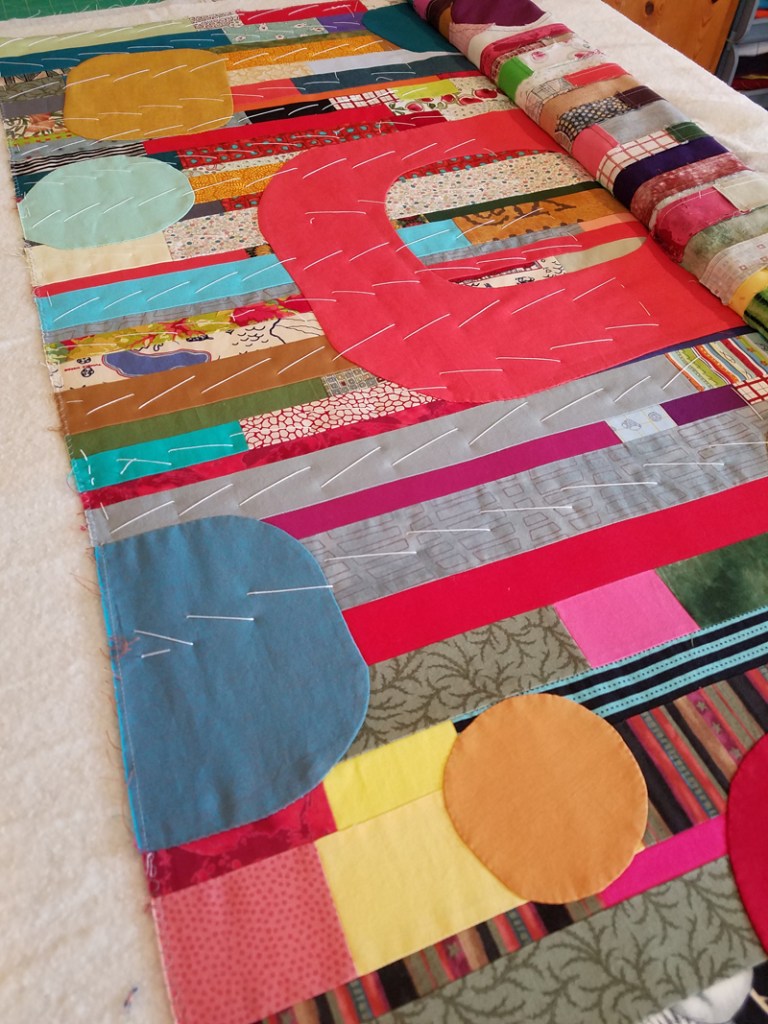
I started moving them around looking for ways they related to each other. This involved a lot of time crawling around the floor, pinning, rearranging (and a bit of unstitching). As I hand appliqued them down, I continued making adjustments.

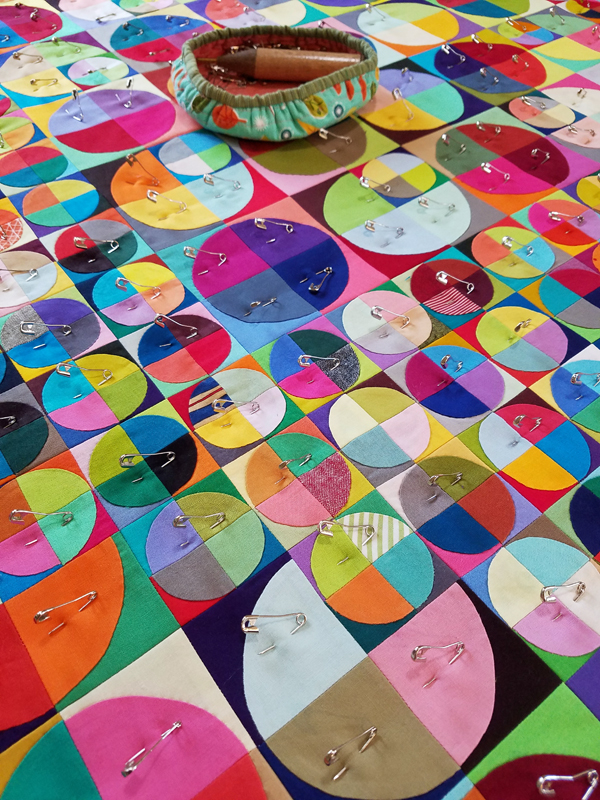
Once the shapes were appliqued, it was time to prepare for basting.

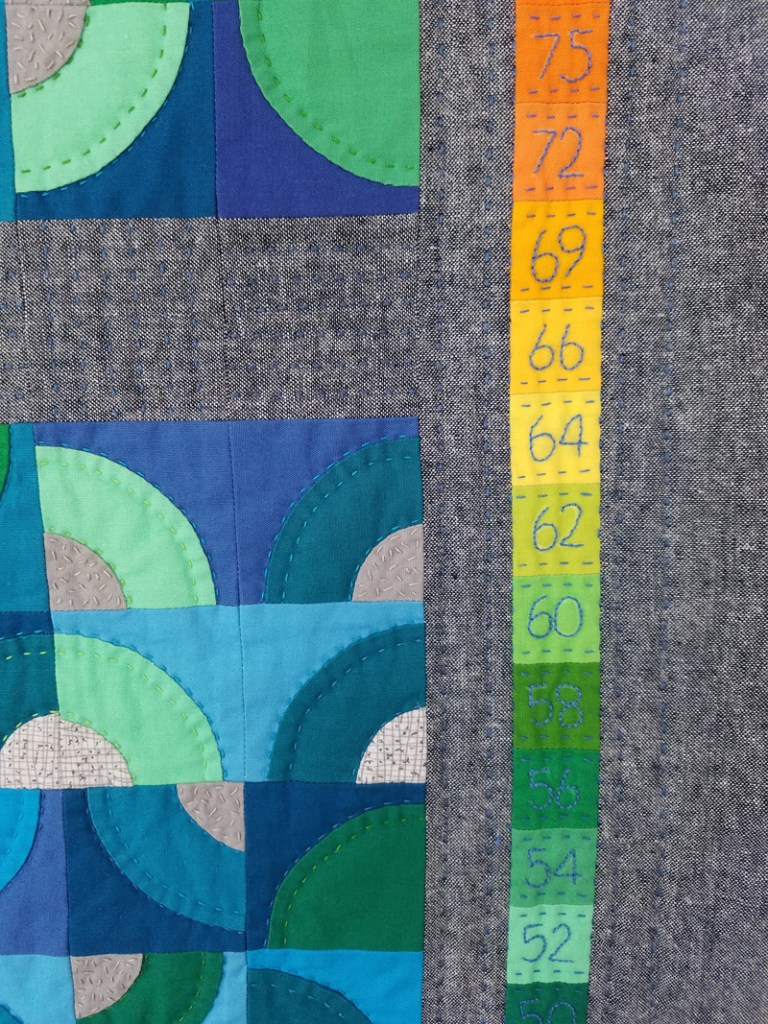
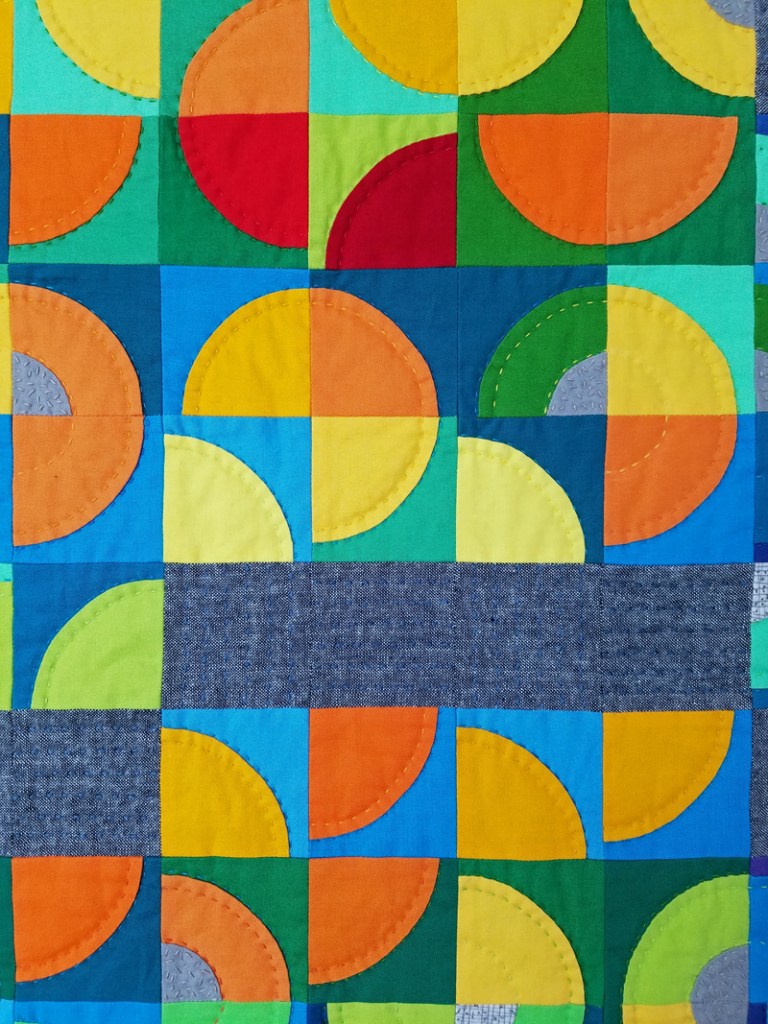
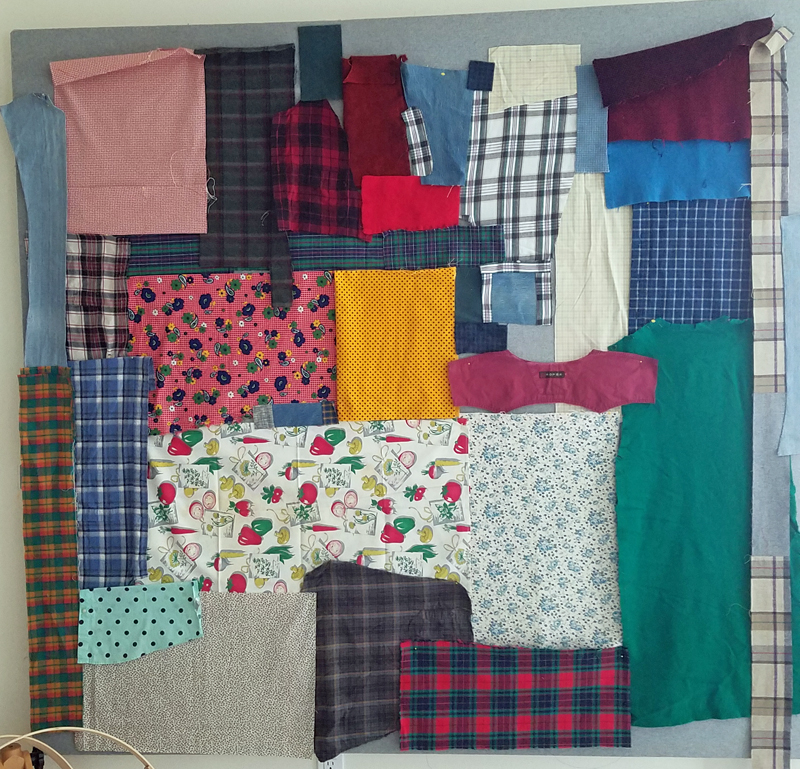
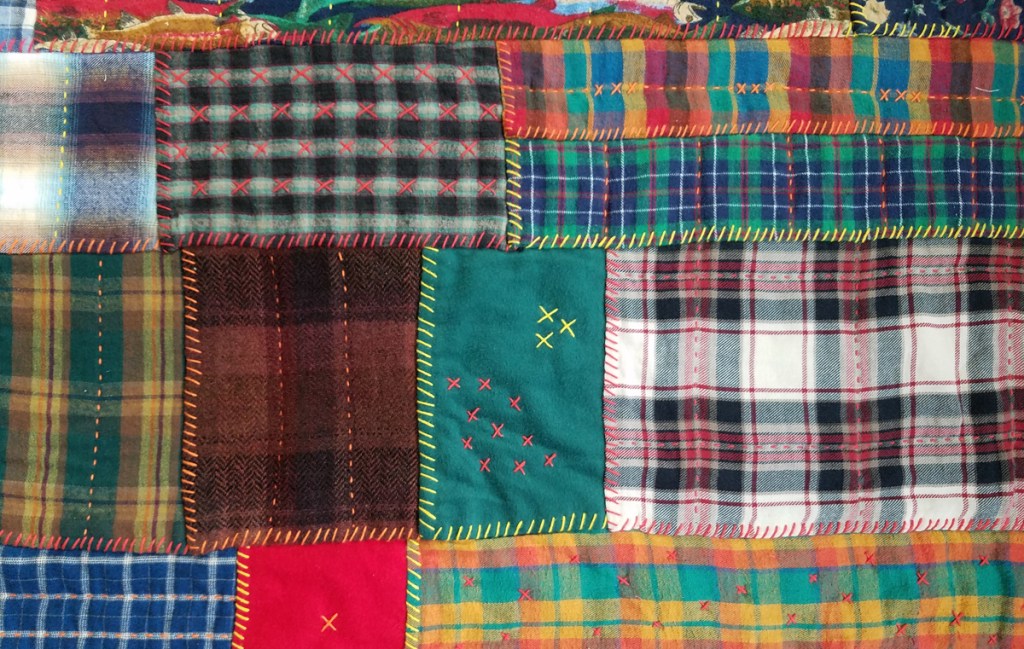
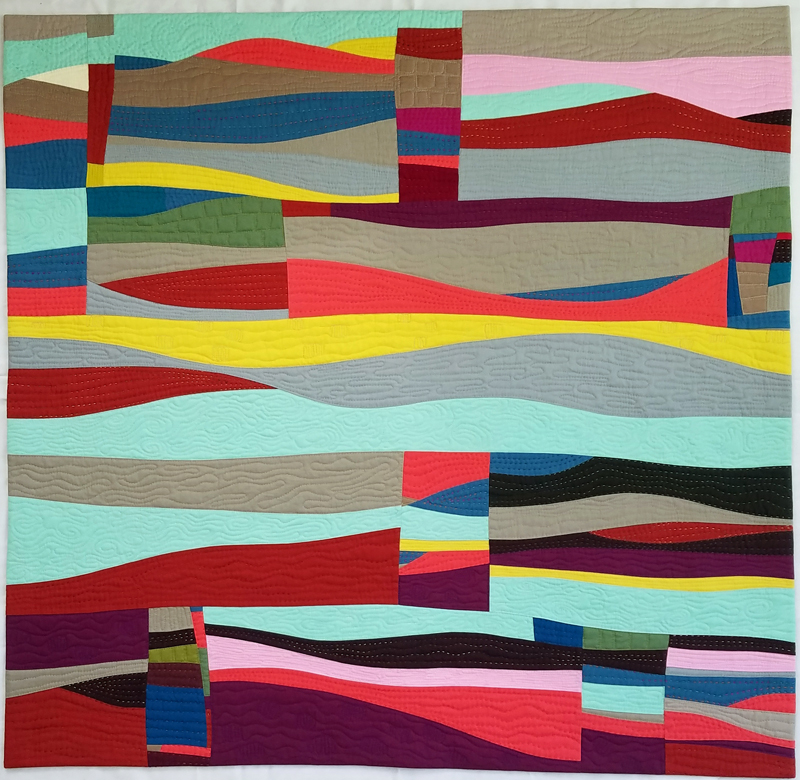
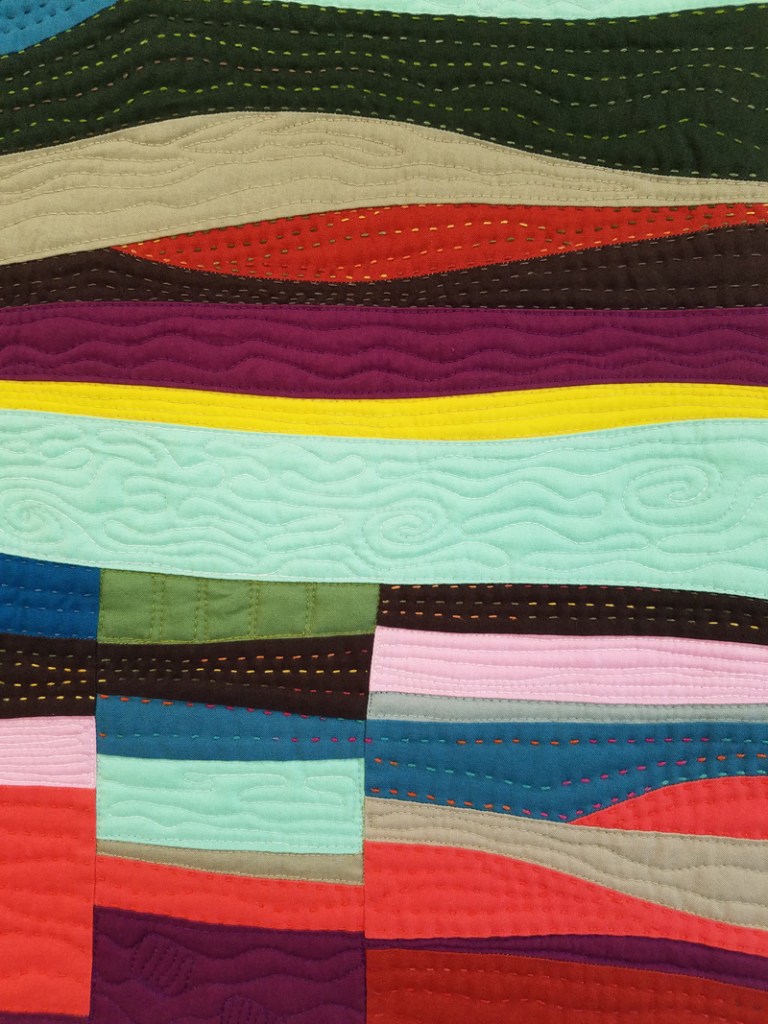
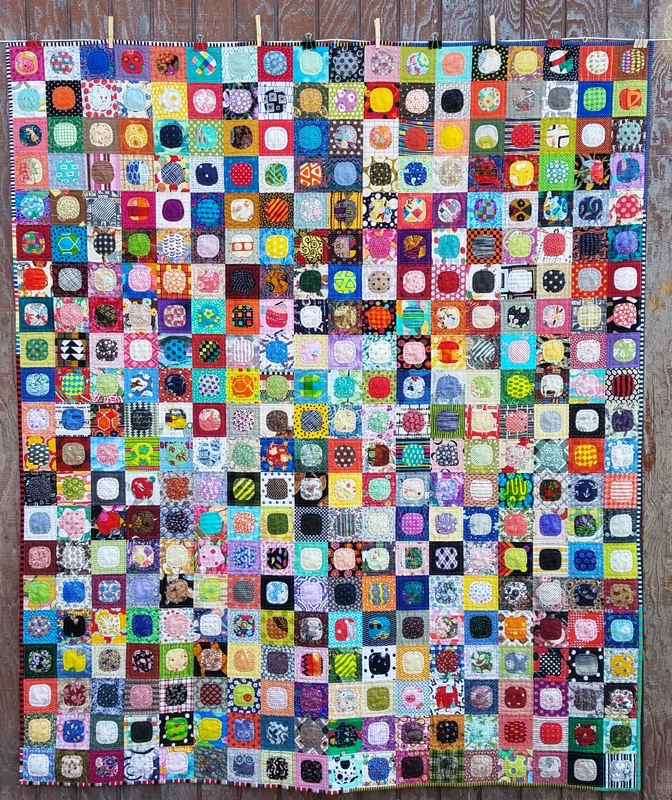
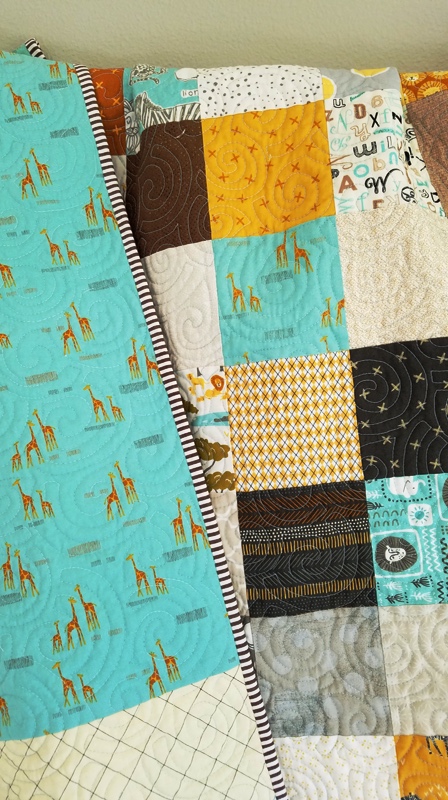
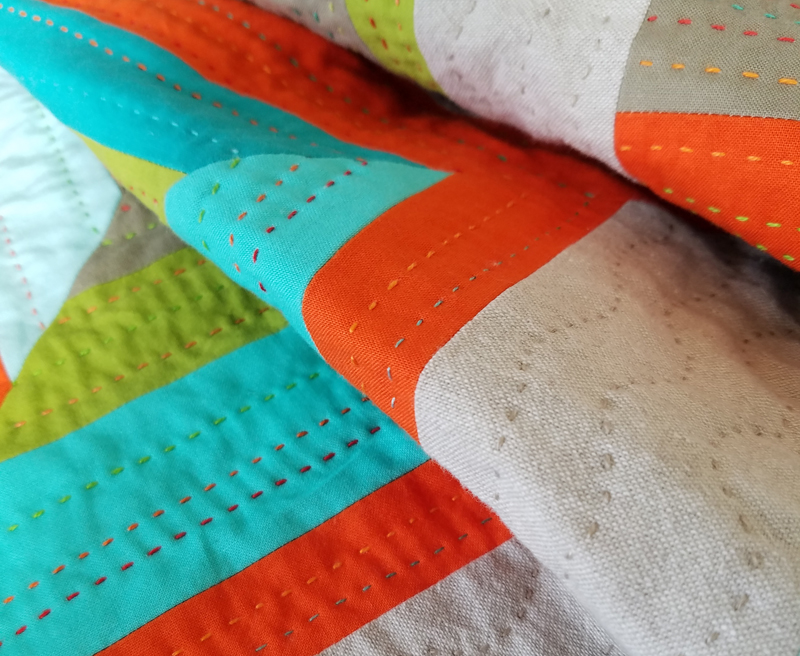
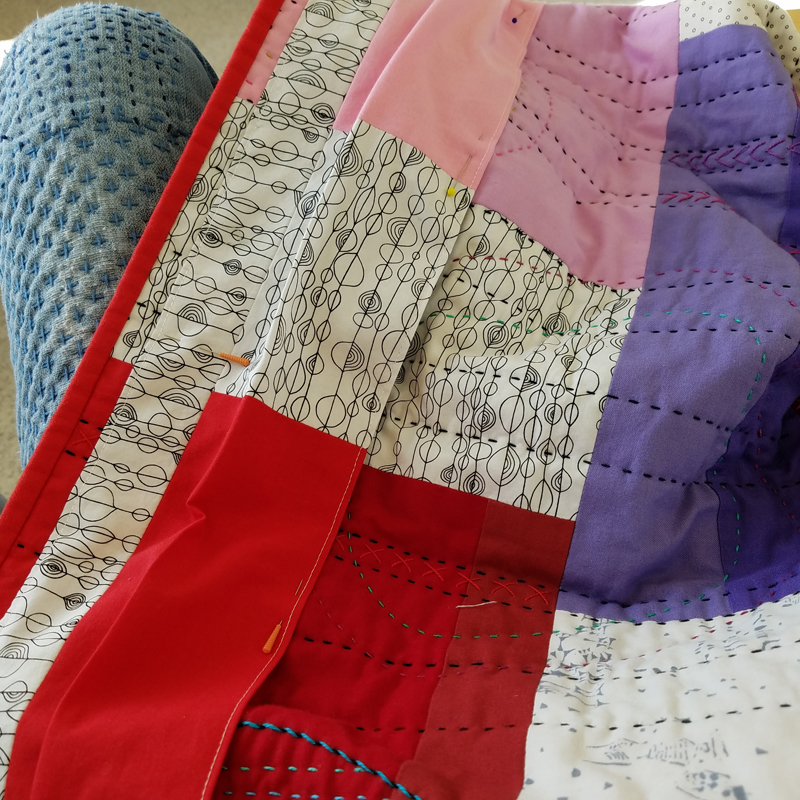
I wanted a backing that would show off the quilting in a different way and make the reverse side interesting in its own right. I combined large, scrappy color blocks with a variety of low volume fabrics.

Reverse side (after quilting, but before embroidering).

Using boards to baste works well for me and I prefer thread over pins.

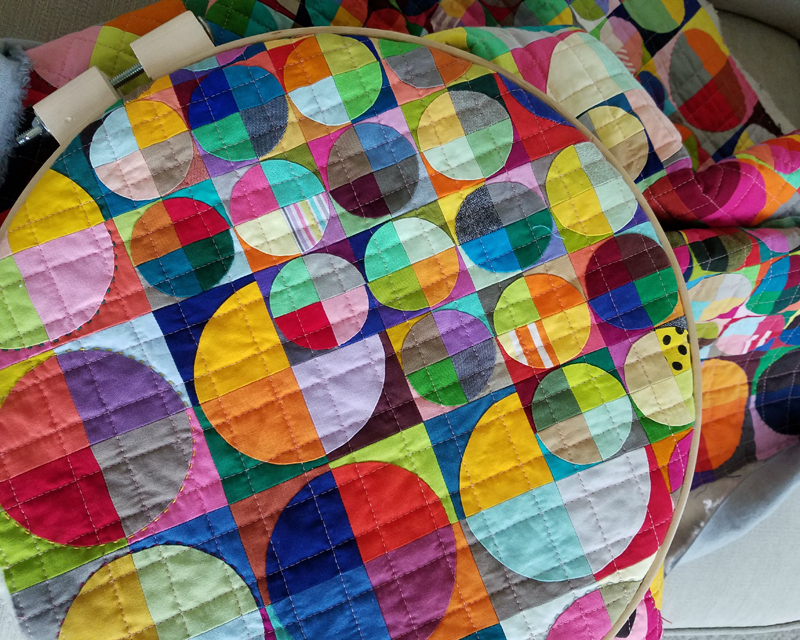
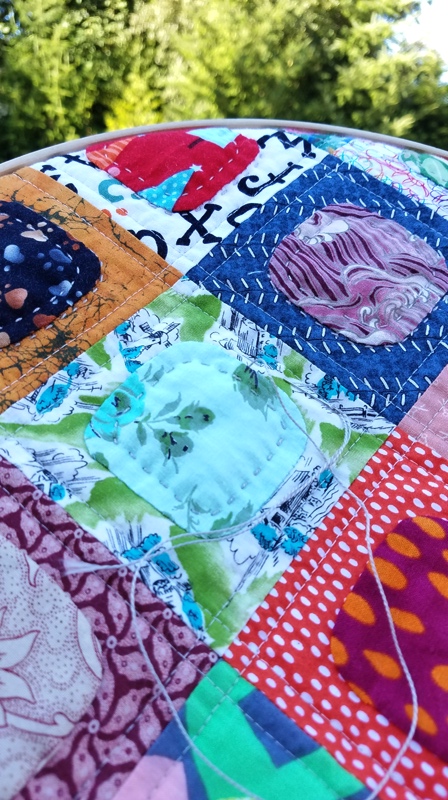
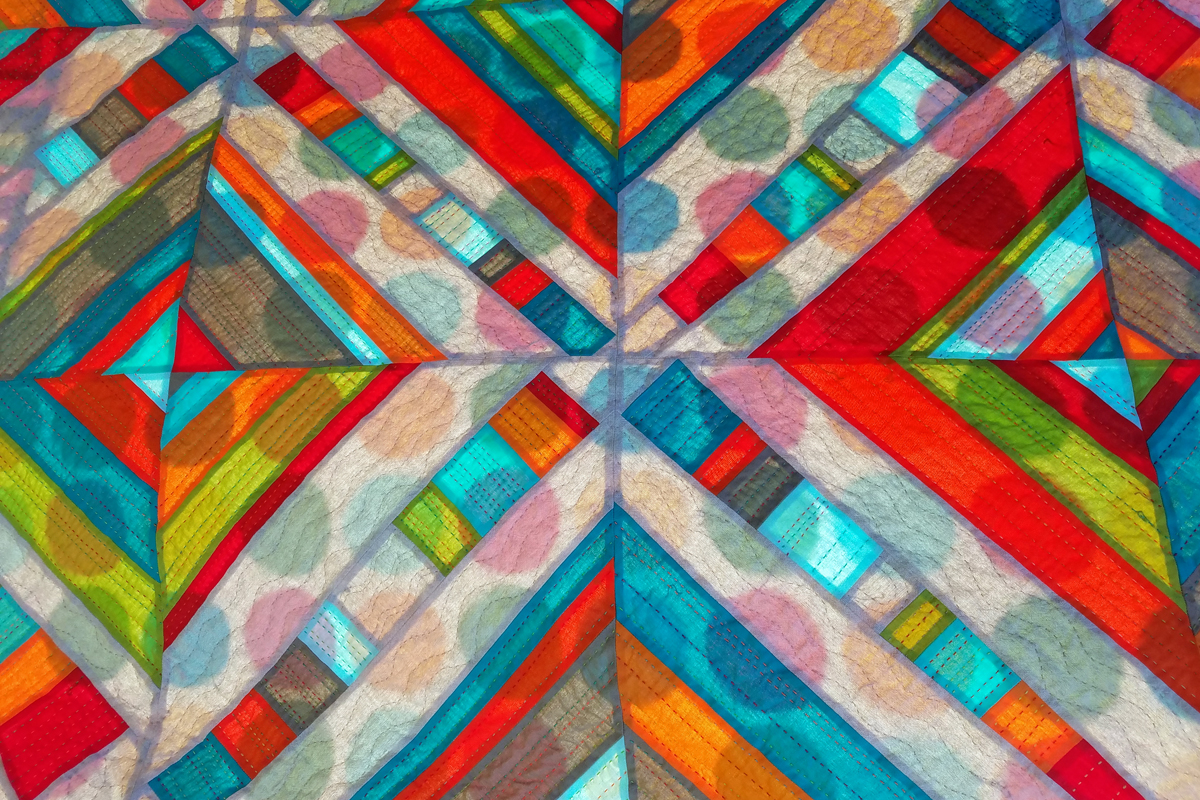
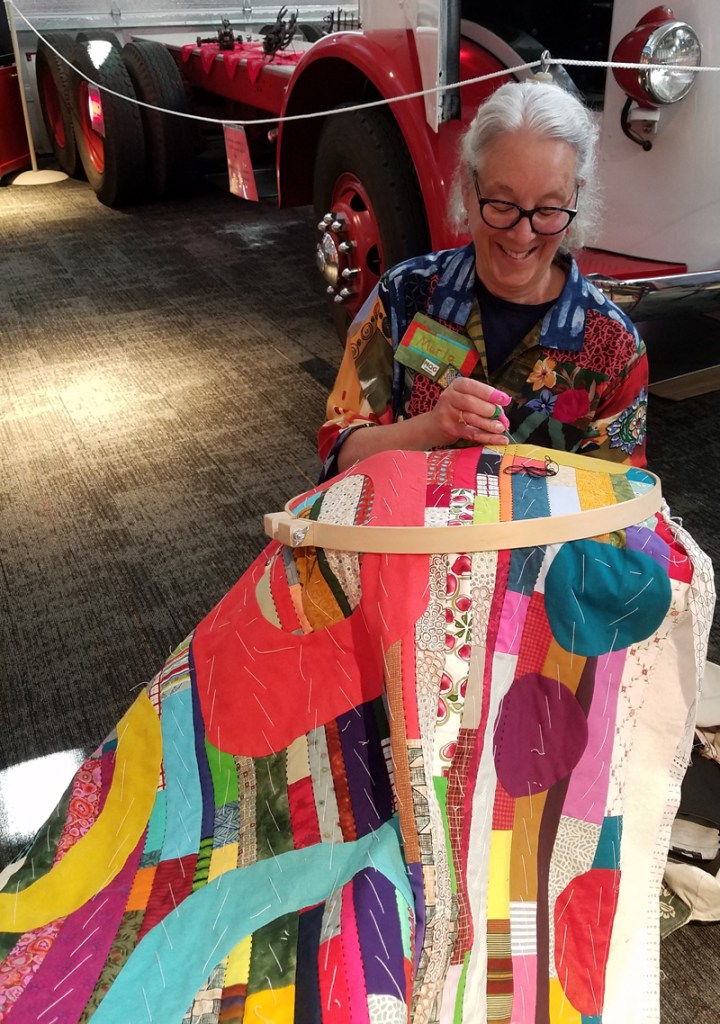
Hand quilting is my favorite part of the process. The long lines of black stitching went fairly quickly. The density of quilting varies on the squircles.

Quilting demonstration at our local museum

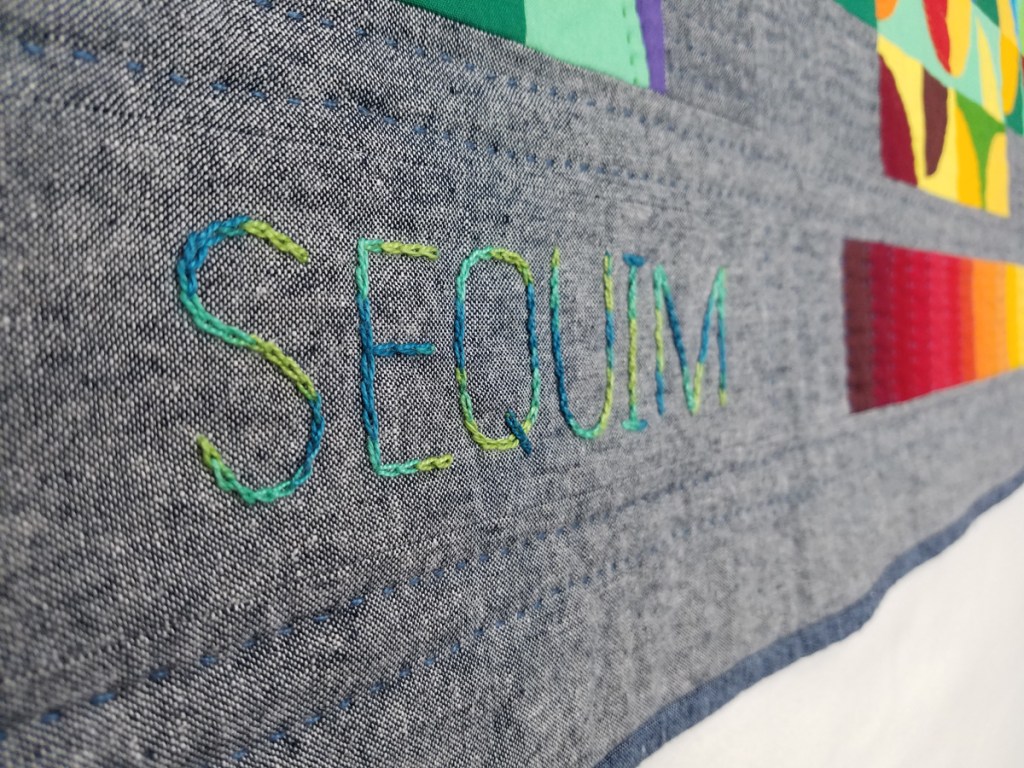
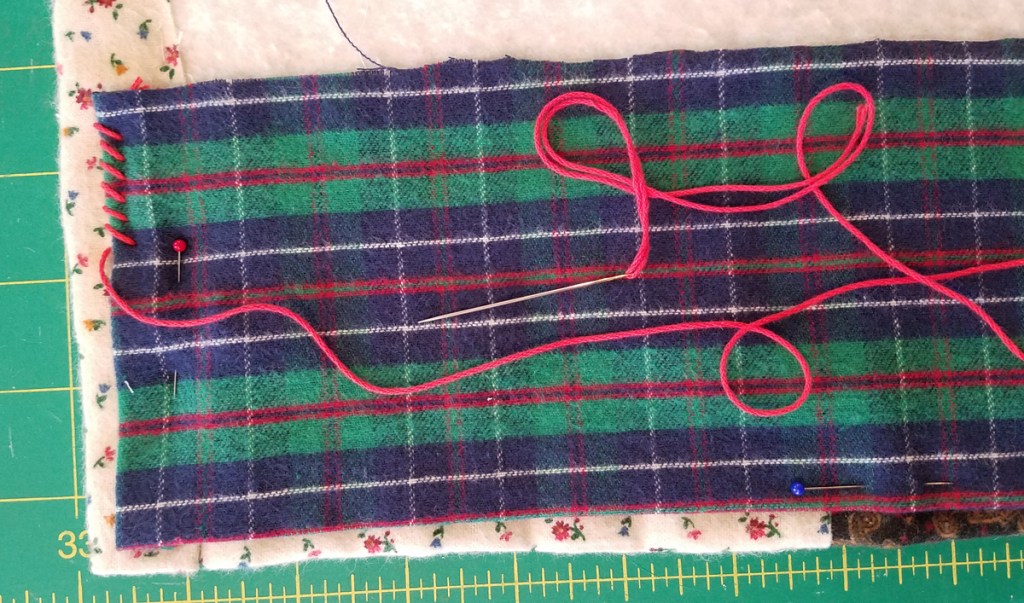
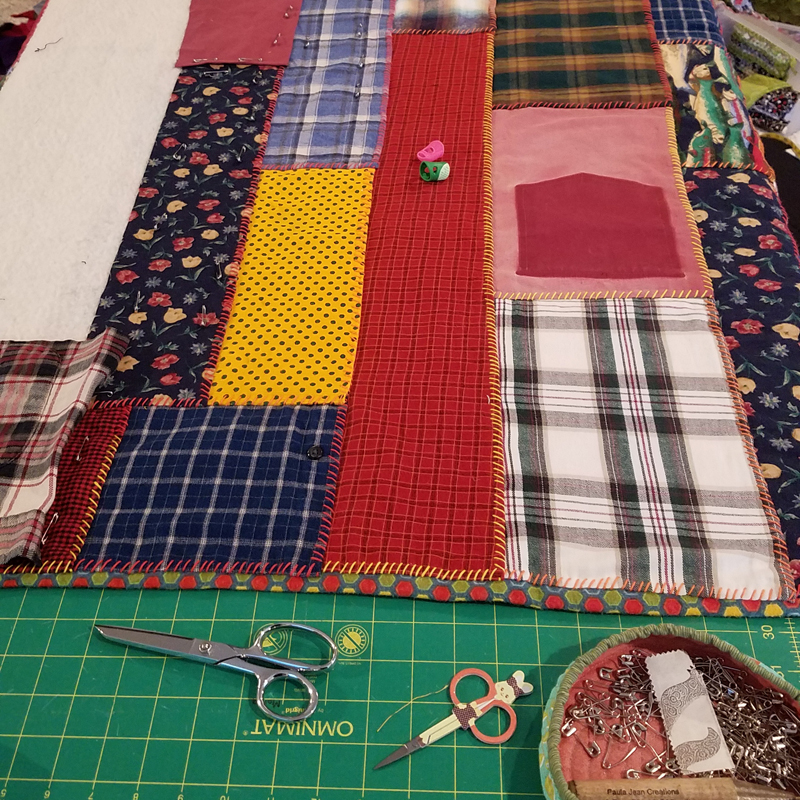
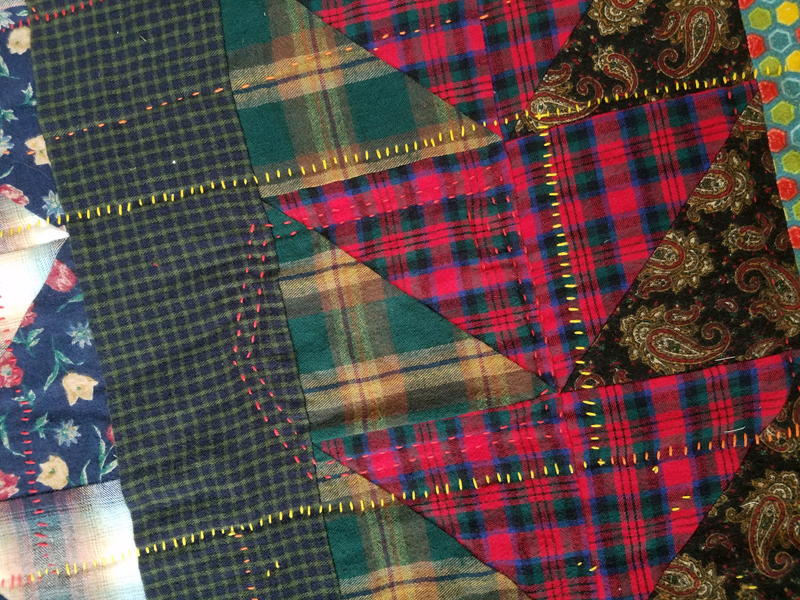
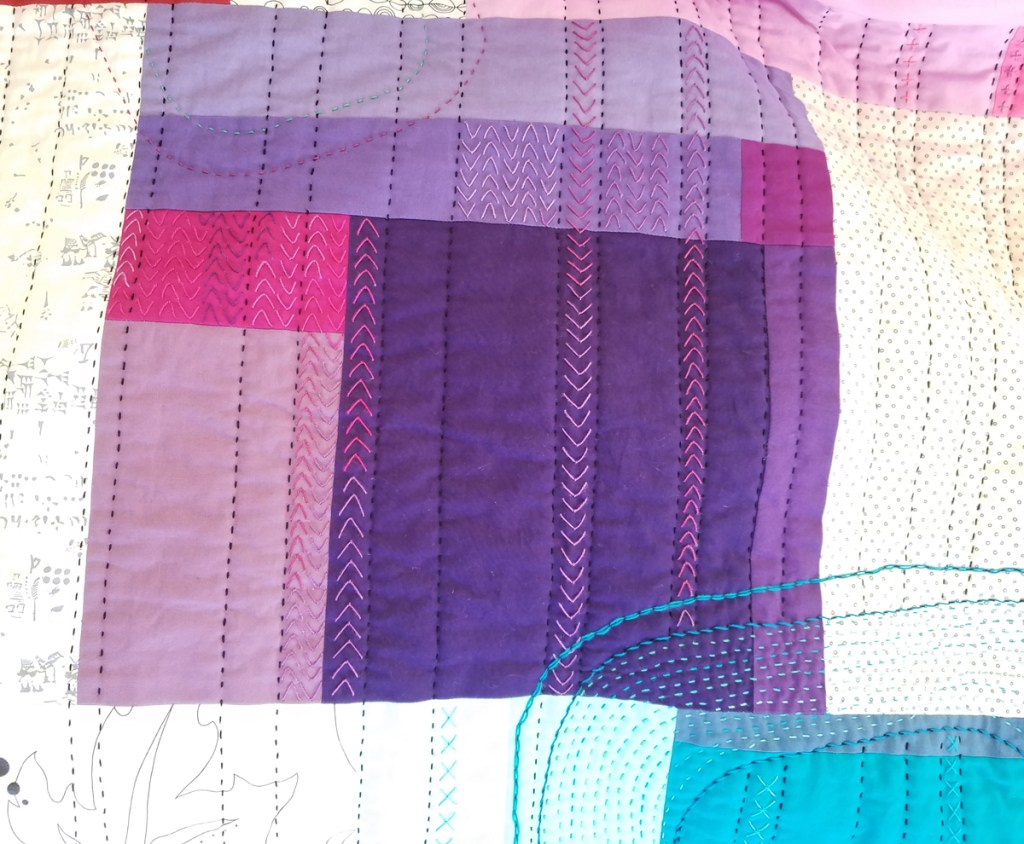
Once the quilting was finished, I turned my attention to the back. Embroidery stitches were added to accentuate the quilting and create extra texture.

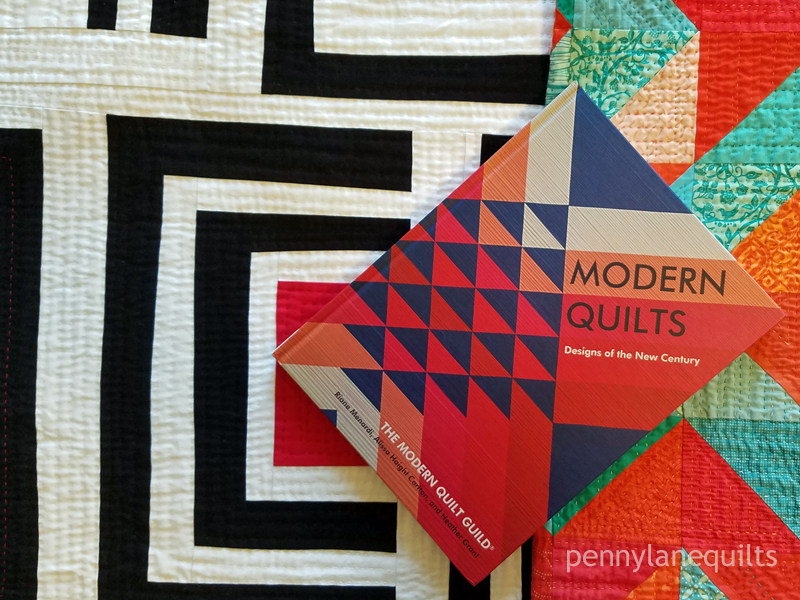
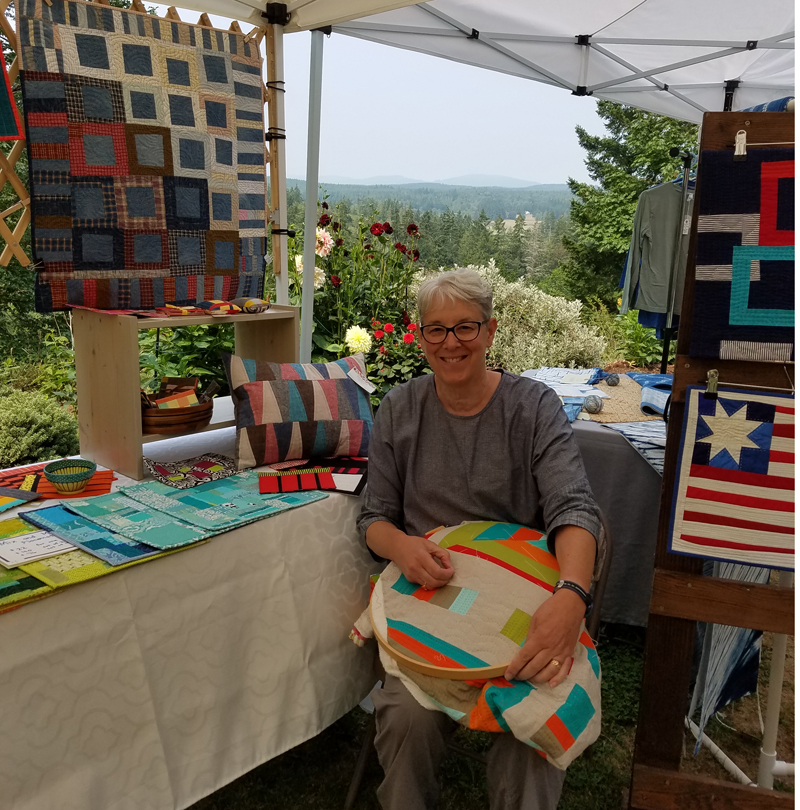
I was thrilled to receive the announcement that Squircle Party will be on display in the “Handwork” category at QuiltCon in Raleigh. This meant it needed a sleeve so I took a little extra time and created one that matched the piecing.

If you have the opportunity, I’d love you to have a peek at the reverse side. Just find one of those “white gloved” volunteers and ask for assistance. Which reminds me, I need to check my schedule and sign up to volunteer!

Volunteering at QuiltCon in Atlanta

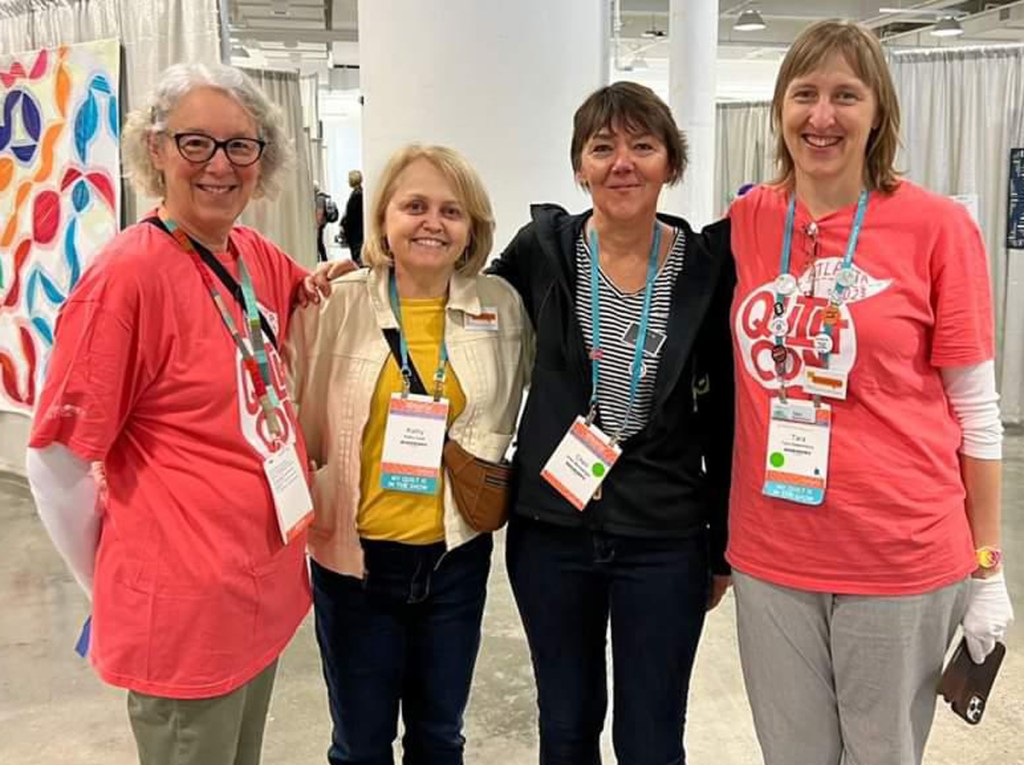
Hope to see you in Raleigh. I can’t wait to see all the quilts in the show and spend time with the special people who make them!
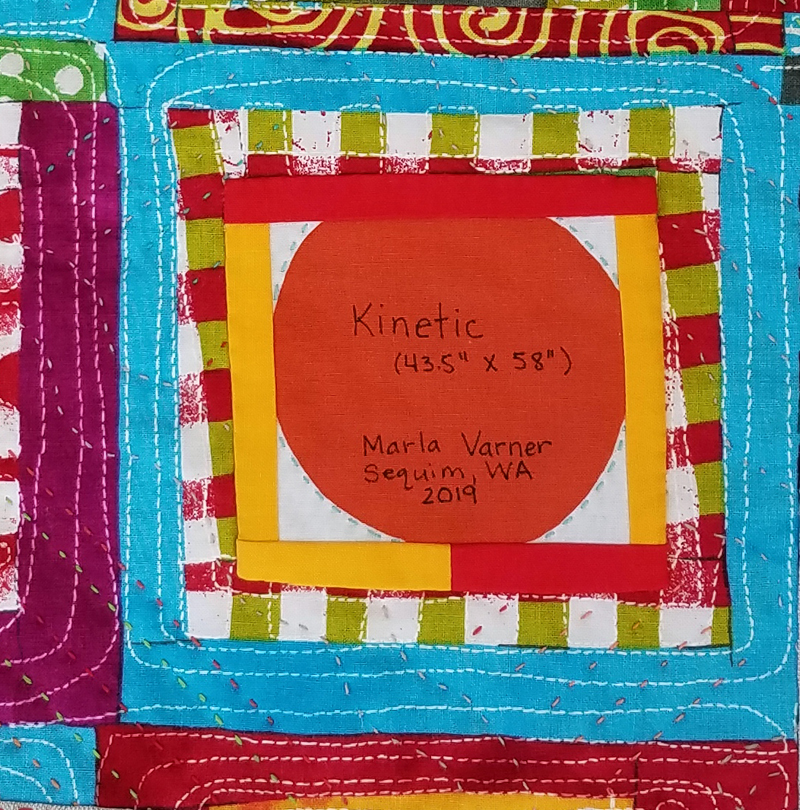
Squircle Party

54″ x 60″

Linen and commercial cottons

Machine pieced, hand appliqued, hand embroidered

Hand quilted

Highs & Lows of 2021 and 2022

Two of my long-term projects were completed in 2023. You can read about the initial process in this post where I describe the layout, fabric selection and piecing methods used in two temperature quilts.

Once the top was finished, it took a good portion of 2022 and 2023 to complete the quilting on my first temperature quilt. I used a combination of thread weights and it was time consuming to stitch around all those quarter circles. I also added embroidery to show the temperature ranges and to indicate the year and location of the temperature data.

High & Lows of 2021

67″ x 43″

Linen and commercial cottons

8 wt and 12 wt perle cotton

Hand and machine pieced

Hand quilted

The second temperature quilt was made with scraps from the previous quilt and each day’s temps are recorded in a one inch block. The quilt was finished using a combination of knot tying and hand quilting. The colonial knots are on the front and the surgical ties are on the back. I love the texture this created on both sides.

Highs & Lows of 2022

33″ x 22.5″

Linen and commercial cottons

8 wt perle cotton

Hand and machine pieced

Hand quilted and tied

Both of these quilts made their debut at the Pacific International Quilt Festival in Santa Clara in October 2023. It was an honor for each of them to receive an award for “Best Hand Workmanship” in their separate categories (from different sets of judges).

To date, I have now completed four quilts created by hand piecing a daily block over the course of a year. (A Squircle a Day and For the Love of Squircles are the other two.) I’ve started a new daily hand stitching project in 2024. Time will tell if it lasts 100 days or 365 days!

Modern waggas

Time to catch up on the past year (or so)! This space is where I record my creative work and the opportunity to tell the stories behind the quilts. Unfortunately, the past year slipped away and if you kind readers will indulge me, I’d like to go back in time and record my quilt finishes in a series of posts.

Two quilts were completed at the end of 2022 which had their beginnings during an online workshop with my friend, Tara Glastonbury, of Stitch and Yarn. She gave us some history of the wagga, a utilitarian quilt tradition unique to Australia. I found useful background information at the National Wool Museum from an exhibition there in 2021-2022. I have always been fascinated in quilts made across regions and cultures by people with limited resources.

Although my fabric resources are not limited, I looked through what I had available and challenged myself to use a wide variety of textiles. My first pull included flannel shirts, felted wool from garments, corduroy, vintage tablecloths and denim.

Picnic wagga

The box containing the vintage tablecloth had a lot of other vintage fabrics including some table linens and aprons from my grandmother. After editing my selections, my new fabric pull looked like this.

Using scissors and no rulers or measuring tools, I used improvisational piecing techniques to create the top. I tried to leave fabrics their original shape and size, just trimming off what was necessary to puzzle them together.

Several yards of a yellow reproduction fabric (purchased when a local quilt shop closed back in the ’90s) and some bits leftover from the top were pieced together for the backing.

I felt good to piece lots of small batting scraps together before thread basting. It was hand quilted and bound by turning the backing over and stitching it onto the front.

The whole project took less than a month to complete, which is super fast for me! It felt so good to use these fabrics in a new way and I think it will be a perfect picnic quilt. An outdoor photo session kept the horses and cows curious about my activities.

Quilt details:

Picnic Wagga

59″ x 81″

repurposed fabrics

machine pieced

hand quilted

Cozy wagga

I decided to make a second “modern wagga” with some of the flannels and wool fabrics from my original pull using a different approach.

First, I used a flannel top abandoned early in my quilting career to provide the main portion of the backing. I added some fabric to the edges to make it larger, and then basted it to a wool batting, with the edges turned to the front and stitched down. Each piece was added using a thick Sashiko thread to whip stitch through all the layers. Using this approach, the quilt is completely quilted and bound when the last piece is added.

First piece applied, stitching the two finished edges.

I used three colors of Sashiko thread and mostly flannel, felted wool, corduroy and chambray from my collection of previously worn garments.

Placing the next piece or two by covering raw edges and whip stitching the turned edges, the quilt grew quickly. I used scissors to cut rectangular pieces many with pockets, buttons and buttonholes.

Even though the quilt was technically complete when the last piece was added, I decided to add additional stitching since most of the pieces were rather large. I also stitched pocket openings closed and stitched over buttonholes because this quilt will get lots of wear. (Besides, it was so warm and cozy sitting underneath it in December, I was thoroughly enjoying the stitching.) This quilt is completely stitched by hand and was also completed in less than a month!

detail of front
detail of back

A dry day in January, and a walk with a friend to the Dungeness River Nature Center, was a perfect photo opportunity.

Quilt details:

Cozy wagga

47″ x 67″

hand pieced

hand quilted

upcycled fabrics and wool batting

Many thanks for Tara for the workshop and sewalong inspiration! I thoroughly enjoyed using different materials and methods to create personal, utilitarian quilts.

Crevices

The quilt I’m sharing today is very different from Tiny Bubbles, in style, technique and process. I’m thrilled to announce that it is also headed to QuiltCon in Phoenix next month.

Crevices (40″ x 45.5″) machine pieced, hand quilted

Crevices began in a virtual workshop with Maria Shell @talesofastitcher which focused on freehand curve and circle techniques. The class was a sampler, but I was particularly intrigued by a technique Maria calls “braided curves”. I pieced a lot of these rectangular units using a controlled palette and began the task of creating a composition.

After about a month of manipulations on the design wall, I decided to edit out many of the units. As I worked, an image of light streaming into a canyon emerged in my mind.

Representational art is not my style and I struggled with how to create the abstract feeling of sunlight on geological structures without it becoming too literal. The palette also felt constrained, so I began adding in new shades as I pieced in additional curvy lines. This exercised my brain in such a good way!

Thread basting is my preference when hand quilting because I don’t like to snag my thread on pins.

The large, curved spaces invited me to add texture by hand quilting. It was so relaxing to stitch these wavy lines using a variety of perle cotton threads.

Originally, I had planned a faced edge, but in the end I decided to go with a pastel binding. I like the way it frames the piece, bringing the lighter shades from the center of the quilt out to the edges. (In real life, the binding is much straighter than the photo would suggest, I promise!)

And what did I do with all the pieces that were edited out of this composition? I created another quilt.

Placing the strips in a horizontal orientation, images of mountains, streams and valleys emerged. For this piece, I challenged myself to work quickly and intuitively, restricting myself to using the leftovers from Crevices. Meander is the result.

Meander (38″ x 36.5″) machine pieced, machine and hand quilted

Improving my free motion quilting skills is an ongoing goal of mine. I explored some organic filler designs and used many motifs from Christina Cameli‘s book, Step-by-Step Texture Quilting. Lots of thread changes and adjusting the motifs to fit the shapes took all of my concentration. About half way through, it was beginning to feel flat and stiff from all the dense quilting. Adding in sections of hand stitches softened the texture.

And what did I do with the leftovers? I still had lots of odd bits that I was determined not to add to the scrap bins, so potholders to the rescue! I donated these to the Friends of the International Quilt Museum to sell in the gift shop as a fundraiser.

Whenever I take a technique workshop, I feel that it shakes things up in my studio. Since I rarely use strip piecing techniques, creating these large units initially felt very quick and satisfying. However, I found it challenging to shape them into compositions. Every quilt teaches me something new!

Tiny Bubbles

It’s been just over a year since my last post and there are a few projects I would like to document here. First up is Tiny Bubbles which began in August 2020 with a sew along hosted by Leslie Tucker Jenison and Michele Muska. We used Jen Carlton Bailly‘s smallest template to create tiny quarter circle units which Jen calls “curvelets”. Each unit finishes at one inch.

With no plan in mind, I liked the idea of hand piecing little blocks from my overflowing scrap bin. (Note to self: if you want to use up scraps, making little units is not a terribly efficient way to do so!) It was the first summer of the pandemic and I enjoyed tuning into the weekly Instagram Live chats with Leslie and Michelle. My process was to make a few units each day, watching them accumulate on the design wall.

At the end of the sew along, I began piecing the curvelets into 4 1/2 inch blocks, forming four circles made up of 16 units. I decided to assemble by machine because I’m not THAT crazy and I still wanted to see how large I could make the final piece before losing interest.

As you can see from this photo, there is some serious shrinkage going on here. The assembly required lots of pinning and careful piecing. Each day I continued to add more curvelets to the collection.

Life continued on in this way until June, 2021, when Jenn McMillan hosted the #100daysummersewalong to encourage any handwork project. I decided to participate and add one 4 1/2″ block a day consisting of four 2 1/2″ quarter circle units. During this time, I continued to assemble the smaller units into blocks.

One morning I came into the studio and the wind had blown over my portable design wall. My friend, Sarah Hibbert @quiltscornerstone thought it looked like they were trying to say something. I decided to put them back on the board and spelled out this “HELP” message. (It’s been a long two years of trying to entertain myself, what can I say?!)

At the end of the summer I decided it was time to reassess and come up with a plan. Looking back at my photos, it looks like I rearranged and added more blocks for about a month before I actually completed the top. Those poor little blocks were about worn out from all the action!

Basting time! I used a gray peppered cotton for the backing which is nice for allowing the quilting to show.

A straight line grid was quilted using the walking foot on my domestic machine. Then I hand quilted around the larger units using perle cotton thread.

Tiny Bubbles was accepted into QuiltCon 2022 in Phoenix and I am happy that people will be able to see it in person to appreciate the scale of the small units. This is the description that I sent with my entry:

 Quilted during the pandemic, these tiny bubbles kept me occupied while isolated in my own small bubble. All of the quarter circles were traced from templates, cut with scissors and pieced by hand. The curved units were then assembled by machine.

Quilt details for those enquiring minds:

44″ x 44″

completed October 2021

curved units hand pieced

assembled on machine

292 (2 inch finished units)

368 (1 inch finished units)

1320 pieces of fabric

Rear View

It’s been exactly a year since my last blog post on January 4, 2020. As much as I would like to fast forward to the present, I decided to document some of my projects from the past year. In future posts, I’ll give more details on some of the quilts which are still in progress.

In January, I began a 100 day project, creating one letter per day.

Over the course of the year, I participated in three swaps and created mini quilts using these little freeform “junction” blocks.

It was an honor to receive the “Quilting Excellence” award at QuiltCon 2020 in Austin. (To read more about “For the Love of Squircles” see my last post.)

“A Squircle a Day” went on a road trip to the southwest in late February, and was my hand quilting companion until its completion in August.

Many masks were donated to our community and given to keep friends and family safe.

A couple of patchwork baby quilts gave me the opportunity to practice some free motion quilting.

I participated in the “littledrunkmonday” sew along hosted by Leslie Jenison @leslietuckerjenison and Michele Muska @michelemuska making little “curvelets” using Jen Carlton-Bailly‘s @bettycrockerass templates. This is all hand pieced and is a long term project. The final size and shape is yet to be determined.

Since early March, we have spent all of our time on the farm with occasional trips to town for groceries and supplies. We are so grateful to have such a beautiful space to call home.

Also among my blessings are the people who encouraged, motivated, inspired and comforted me through the events of the past year. I am eternally grateful for your support and friendship.

Celebrating friendship with Sophie Zaugg @lunalovequilts and her “Love” quilt at QuiltCon 2020.

Wishing you all peace, health and happiness in the year ahead.

For the Love of Squircles

First of all, I’d like to welcome the new readers to the blog since my last post. This quilt was largely responsible for my long absence! I am just adding a label and preparing to ship to Austin, so it is time to tell its story.

The quilt began as a daily project in January of 2018. After piecing my first squircle quilt using print fabric in 2017, I decided to repeat the process with solid fabrics. This time I pieced the background of each block before using needle turn applique to attach the squircle shapes. All of the fabrics came from my scrap bin, and were pieced and stitched randomly, with no particular design in mind.

At the end of the year, I had my 365 blocks plus the 13 extra to again bring my array to 18 x 21. Unlike the previous quilt that was assembled as I went along, this time I had 378 blocks to arrange on the design wall. Looking back through my photos, it looks like I arranged and rearranged them for over a month!

arranging the squircle blocks

I began piecing the blocks just before heading to Nashville for QuiltCon and finished piecing mid-April.

piecing the squircle quilt

By the middle of May, it was basted with a fluffy Hobbs Tuscany wool batting and an extra wide peppered cotton backing. I loved the way it felt once it was basted and couldn’t wait to start hand quilting!

preparing to baste For the Love of Squircles

Fortunately, I  had stocked up on WonderFil Eleganza perle cotton #8 while I was at QuiltCon.

My goal was to have it completed by the December 2 deadline for  submissions to QuiltCon 2020 in Austin. Here is my hoop on the first day of quilting.

squircles quilt hand quilting, Marla Varner, penny lane quilts

After quilting for a few days, I estimated that I would need to quilt an average of three hours a day to make that deadline. That seemed doable! I worked on it steadily throughout the summer and tried to make up for lost time when I was away from home on other adventures.

By September, it became obvious that I had miscalculated, and I began quilting all day every day. This is not something I would recommend, as it takes a toll on the body.  I tried to  consistently  take breaks, do hand and shoulder exercises, change chairs and positions which all helped to keep me stitching. I also listened to a LOT of audiobooks. There were many days when I abdicated all but the most pressing of daily responsiblities. And here is my hoop on the final day of quilting.

last day of quilting For the Love of Squircles by Marla Varner penny lane quilts

Late November found me trimming and attaching the binding. Trying to get good photos on gray, rainy days was a stressful part of the submission process. A goal for this year is to improve my photography set up.

My diligence paid off and the quilt submission was in before Thanksgiving…a new record for me! Many thanks to Audrey Esarey @cottonandbourbon for suggesting the name of the quilt to me. (She is a rising star in the modern quilt community…I highly recommend you check out her amazing work.)

For the Love of Squircles by Marla Varner penny lane quilts

It was so exciting to get the news that it was accepted to QuiltCon and I am looking forward to traveling to Austin again. Maybe I’ll see you there!

Hand Quilting: Try it, you’ll like it!

What’s not to love about hand quilting?! It’s tactile, portable and you only need a few basic tools and supplies to get started.

squircles quilt hand quilting, Marla Varner, penny lane quilts

I began hand quilting in the mid-90s because I had a quilt to finish. My sewing machine wasn’t  adequate for piecing, let alone quilting, and I liked handwork. Besides, most of my mentors hand quilted. I loved the fact that I could visit while quilting at weekly gatherings with friends. And slowly, but surely, quilts would get finished.

The texture of hand quilting has always appealed to me. There is something about the process of manipulating that quilt sandwich as you pull your thread through it, that makes it so soft and drapey.

Kinetic, Marla Varner, penny lane quilts, hand quilting

Sometimes, just adding a bit of hand quilting seems to make the quilt more personal.

hand quilting detail, Marla Varner, penny lane quilts

A mini for a challenge is another good place to try some hand stitching without committing to a larger project.

Marla Varner, red, white and blue challenge, Bainbridge Island MQG

Two of my hand quilted favorites appear in Modern Quilts: Designs of the New Century which I wrote about here.

MQG book with quilts

The MQG has a travelling exhibition of quilts from the book. I am very excited that it is coming to the Whatcom Museum in Bellingham, Washington, June 1 – August 25, 2019. One of my quilts, Trestle Nestle, is included in the exhibit.

Trestle Nestle by Marla Varner, penny lane quilts
Trestle Nestle (56″ x 51″) hand quilted, white linen and Kona solids

The Whatcom Museum has many events planned to coincide with the exhibition this summer, so if you are in the area, check out all their offerings. If you are interested in seeing more of my quilts or learning about hand quilting, I will be involved in two of the events:

Modern with a Hint of Vintage (lecture) July 27, 2:00-3:00

Hand Quilting Intro and Inspiration (workshop) July 28, 10:00-2:00

If you’re already a convert, what do you like best about hand quilting? If not, I hope you will consider hand quilting as an option on your next project. Try it, you might like it!


Kinetic

Back in April, 2017, I learned that my friend Daniela, BlockM Quilts,  would be visiting Seattle (from Germany) and planned to take a workshop with Katie Pedersen , SewKatieDid. I jumped at the opportunity to join Daniela at Katie’s studio for the Psychedelic Baby Quilt Block/Modern Improv Strip Piecing Workshop.

After viewing many of Katie’s wonderful quilts using this block, we each came up with a plan and began creating strip sets.

beginning strip set penny lane quilts

After the strips were pieced, we cut blocks from each set.

Daniela BlockM Quilts working on psychedelic baby quilt blocks
Daniela arranging a new strip set

psychedelic baby quilt blocks
When the blocks are cut, they create lots of “waste” triangles as seen in the center of the photo

Back home, I created a few more blocks and decided on a layout for my quilt.

psychedelic baby blocks for my quilt

After deciding to hand quilt, I gathered my perle cotton threads and began the lovely, SLOW process of adding texture to the quilt.

detail of hand quilting, marla varner, penny lane quilts

detail of hand quilting from the back side of Kinetic, Marla Varner, penny lane quilts
detail of the quilting from the back

I tend to hand quilt in spurts, here and there when I have time. It is the perfect portable project. This quilt has traveled on  long road trips and made an appearance at several  events. Every stitch helps move the project along.

hand quilting during port townsend studio tour Marla Varner, penny lane quilts
Stitching and enjoying the view at Egg & I Pottery during the Port Townsend studio tour.

When the quilting was eventually finished, I decided to use yarn dyed linen  for the binding. I tried something new (for me) and did some visible stitching to attach the binding on the back. It was fun to change thread colors as I went around the quilt using 8 wt perle cotton.

binding detail using perle cotton

All it needed was a name and a label and just like that (lol), a finished quilt almost two years in the making.

label for Kinetic, Marla Varner, pennylanequilts

Kinetic, by Marla Varner, Penny Lane Quilts
Kinetic (43.5″ x 58″)

Kinetic view of back Marla Varner, pennylanequilts

Love this view with the sun shining through the layers. I think it looks downright psychedelic!

sun shining through Kinetic, Marla Varner

Now that this one is finished, I am free to start playing with those leftover triangles…

leftover triangles from Kinetic


Interview with Pat Sloan, American Patchwork and Quilting Podcast

It was so much fun chatting with Pat Sloan on her podcast today! I appreciate her enthusiasm and love listening to her weekly interviews.

We briefly discussed a wide range of topics including my quilt making journey, the sewing machines I use, dyeing fabric, hand quilting and my business, Penny Lane Quilts .

Listen to the podcast now to learn a little more about what I do here on Penny Lane.  I hope you enjoy the show and I’d love to hear your thoughts.