Two of my long-term projects were completed in 2023. You can read about the initial process in this post where I describe the layout, fabric selection and piecing methods used in two temperature quilts.
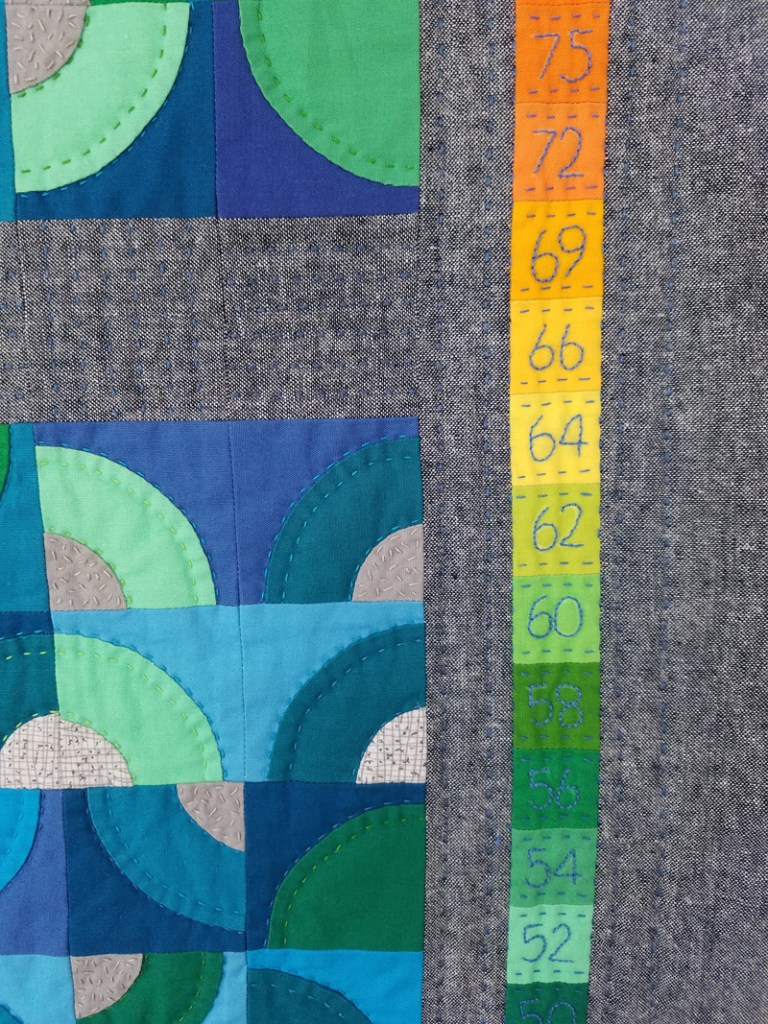
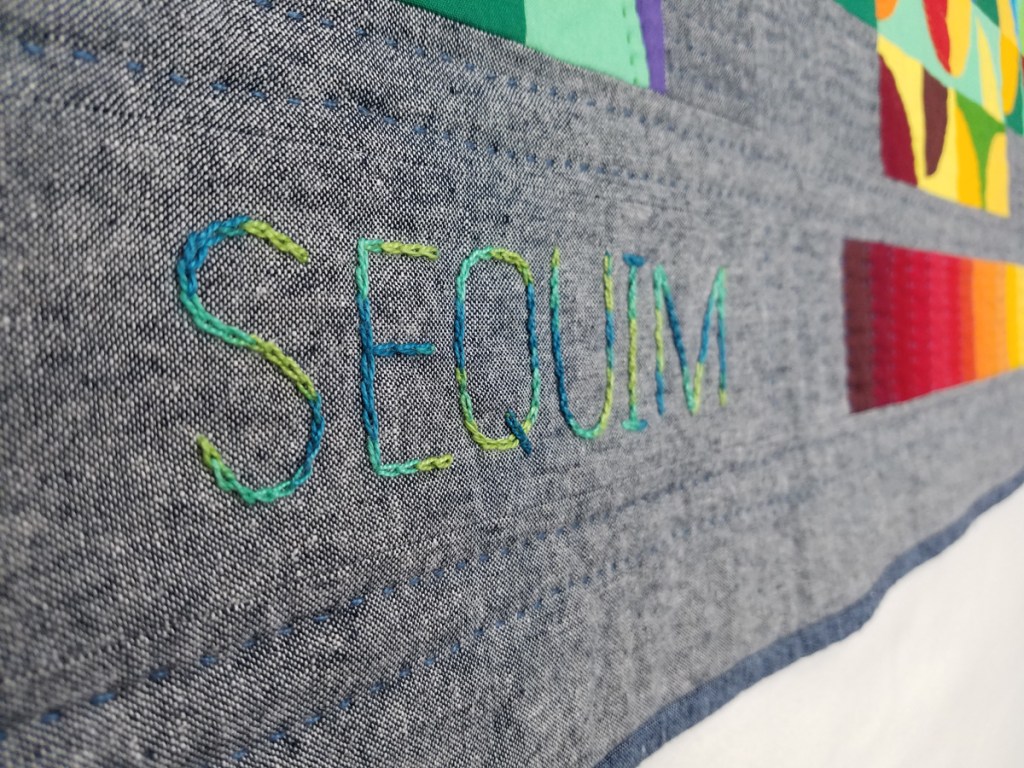
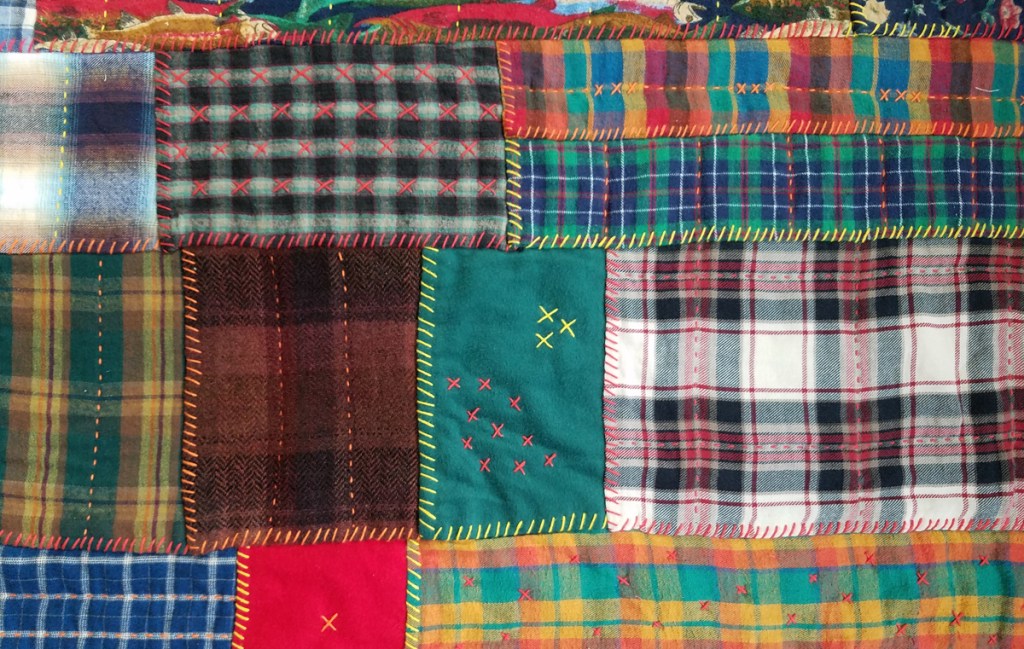
Once the top was finished, it took a good portion of 2022 and 2023 to complete the quilting on my first temperature quilt. I used a combination of thread weights and it was time consuming to stitch around all those quarter circles. I also added embroidery to show the temperature ranges and to indicate the year and location of the temperature data.
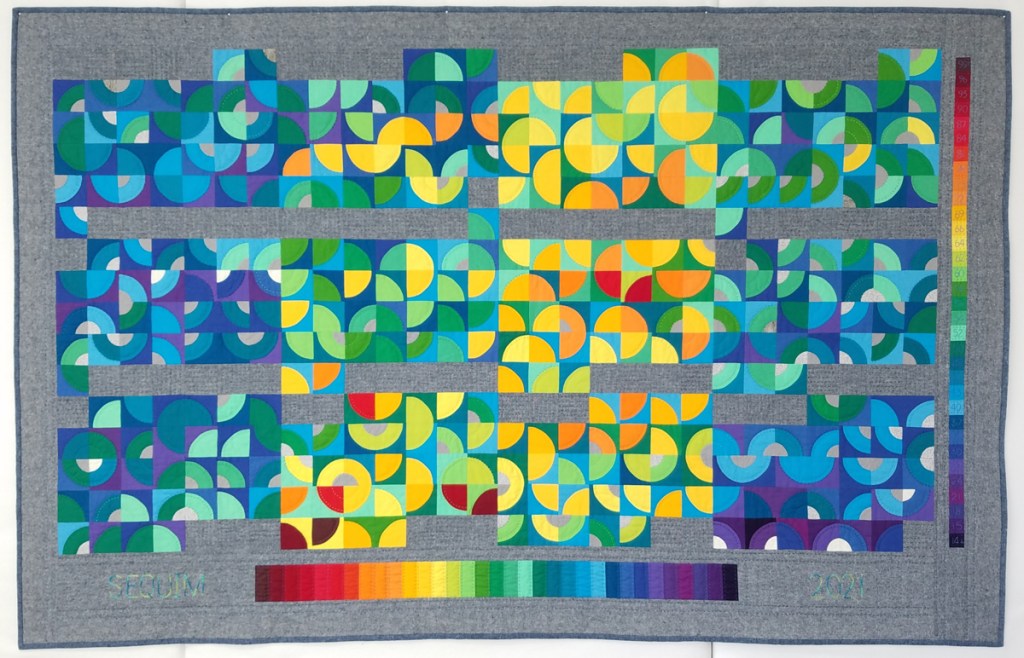
High & Lows of 2021
67″ x 43″
Linen and commercial cottons
8 wt and 12 wt perle cotton
Hand and machine pieced
Hand quilted
The second temperature quilt was made with scraps from the previous quilt and each day’s temps are recorded in a one inch block. The quilt was finished using a combination of knot tying and hand quilting. The colonial knots are on the front and the surgical ties are on the back. I love the texture this created on both sides.
Highs & Lows of 2022
33″ x 22.5″
Linen and commercial cottons
8 wt perle cotton
Hand and machine pieced
Hand quilted and tied
Both of these quilts made their debut at the Pacific International Quilt Festival in Santa Clara in October 2023. It was an honor for each of them to receive an award for “Best Hand Workmanship” in their separate categories (from different sets of judges).
To date, I have now completed four quilts created by hand piecing a daily block over the course of a year. (A Squircle a Day and For the Love of Squircles are the other two.) I’ve started a new daily hand stitching project in 2024. Time will tell if it lasts 100 days or 365 days!
Time to catch up on the past year (or so)! This space is where I record my creative work and the opportunity to tell the stories behind the quilts. Unfortunately, the past year slipped away and if you kind readers will indulge me, I’d like to go back in time and record my quilt finishes in a series of posts.
Two quilts were completed at the end of 2022 which had their beginnings during an online workshop with my friend, Tara Glastonbury, of Stitch and Yarn. She gave us some history of the wagga, a utilitarian quilt tradition unique to Australia. I found useful background information at the National Wool Museum from an exhibition there in 2021-2022. I have always been fascinated in quilts made across regions and cultures by people with limited resources.
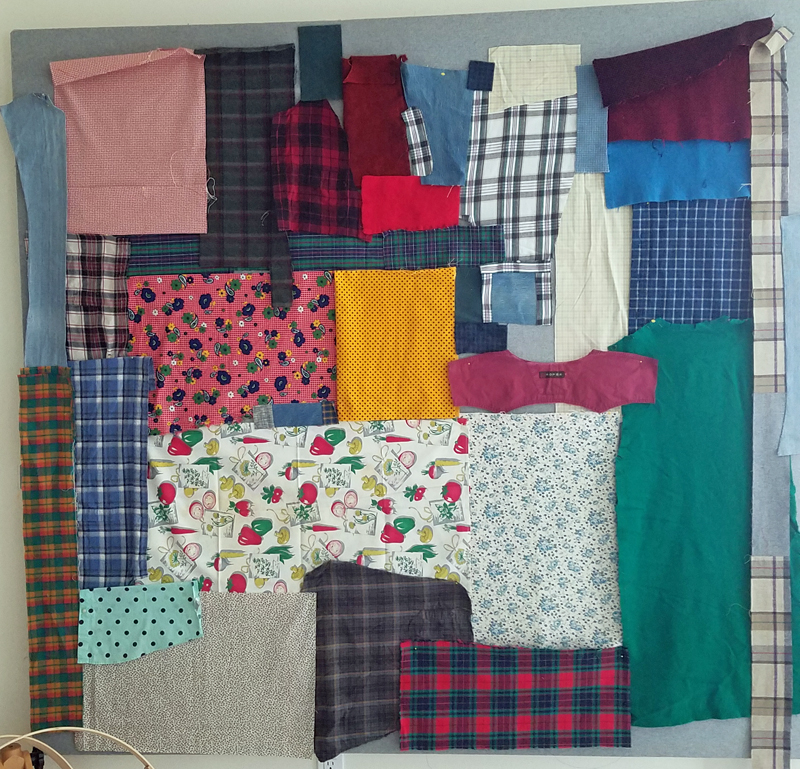
Although my fabric resources are not limited, I looked through what I had available and challenged myself to use a wide variety of textiles. My first pull included flannel shirts, felted wool from garments, corduroy, vintage tablecloths and denim.
Picnic wagga
The box containing the vintage tablecloth had a lot of other vintage fabrics including some table linens and aprons from my grandmother. After editing my selections, my new fabric pull looked like this.
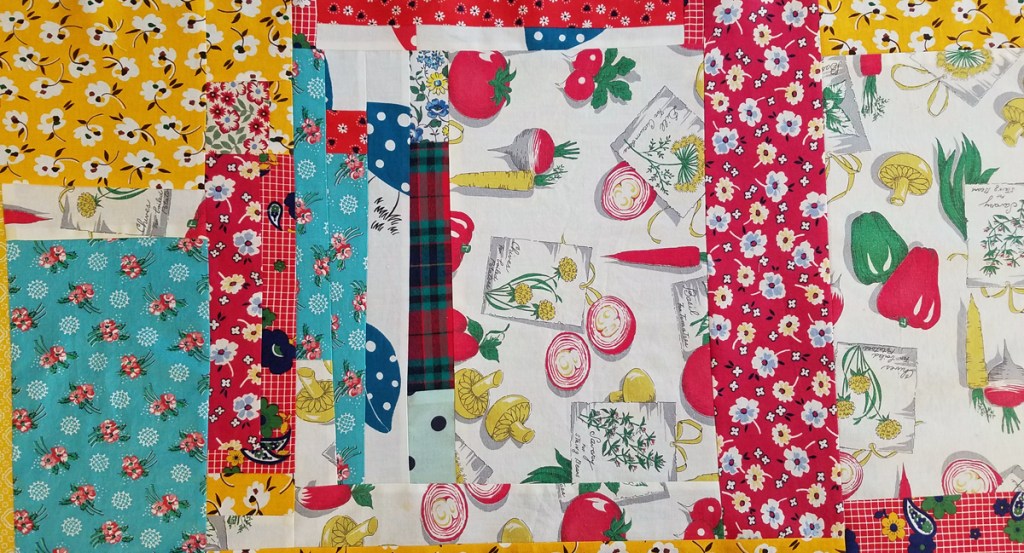
Using scissors and no rulers or measuring tools, I used improvisational piecing techniques to create the top. I tried to leave fabrics their original shape and size, just trimming off what was necessary to puzzle them together.
Several yards of a yellow reproduction fabric (purchased when a local quilt shop closed back in the ’90s) and some bits leftover from the top were pieced together for the backing.
I felt good to piece lots of small batting scraps together before thread basting. It was hand quilted and bound by turning the backing over and stitching it onto the front.
The whole project took less than a month to complete, which is super fast for me! It felt so good to use these fabrics in a new way and I think it will be a perfect picnic quilt. An outdoor photo session kept the horses and cows curious about my activities.
Quilt details:
Picnic Wagga
59″ x 81″
repurposed fabrics
machine pieced
hand quilted
Cozy wagga
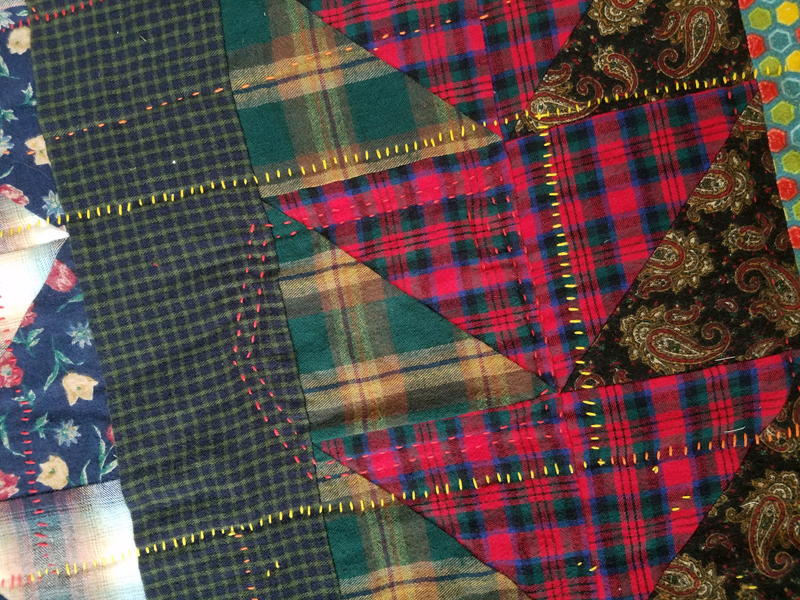
I decided to make a second “modern wagga” with some of the flannels and wool fabrics from my original pull using a different approach.
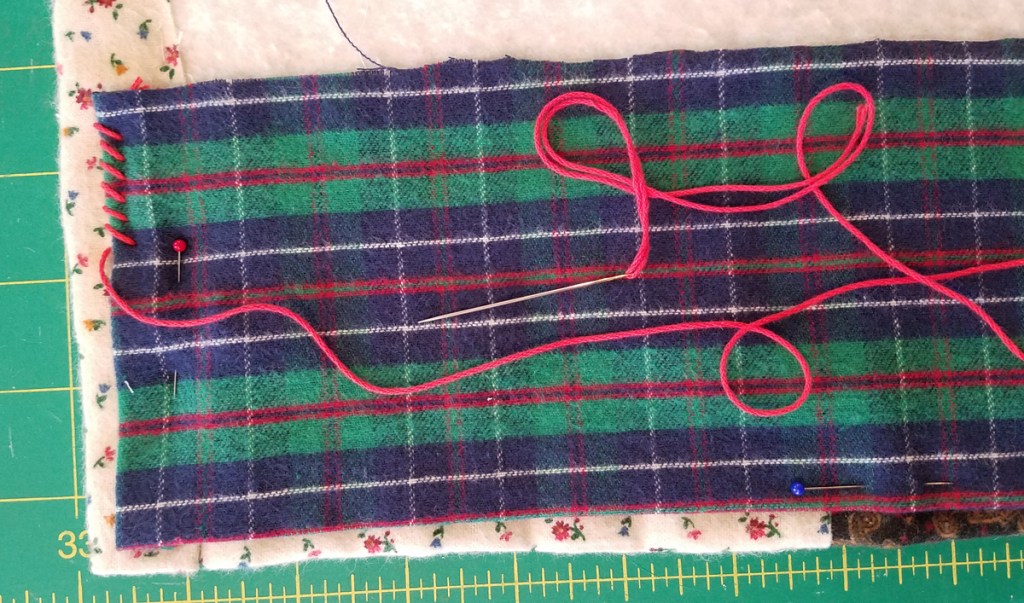
First, I used a flannel top abandoned early in my quilting career to provide the main portion of the backing. I added some fabric to the edges to make it larger, and then basted it to a wool batting, with the edges turned to the front and stitched down. Each piece was added using a thick Sashiko thread to whip stitch through all the layers. Using this approach, the quilt is completely quilted and bound when the last piece is added.
First piece applied, stitching the two finished edges.
I used three colors of Sashiko thread and mostly flannel, felted wool, corduroy and chambray from my collection of previously worn garments.
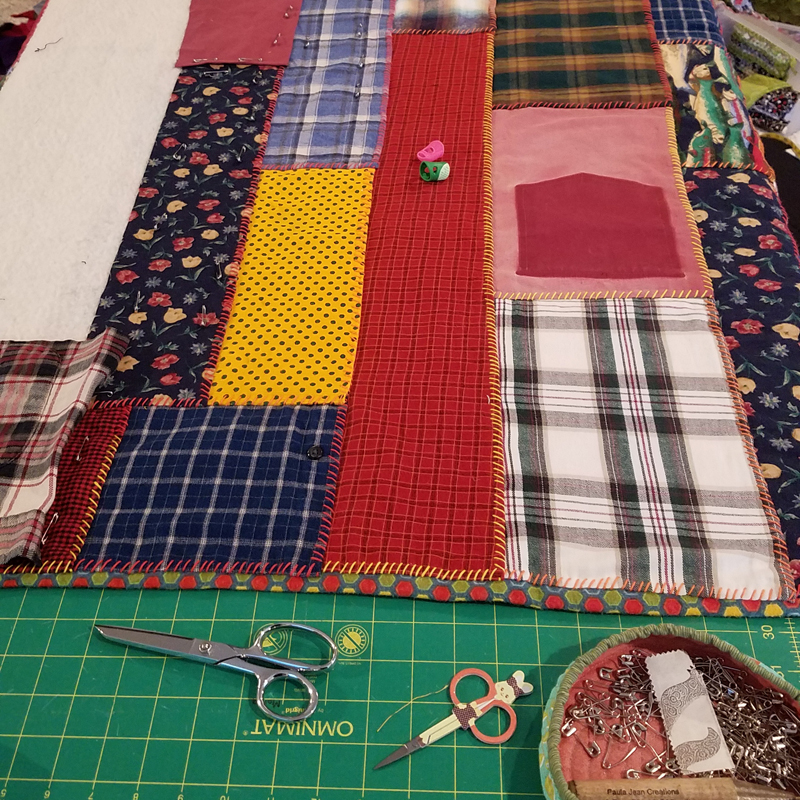
Placing the next piece or two by covering raw edges and whip stitching the turned edges, the quilt grew quickly. I used scissors to cut rectangular pieces many with pockets, buttons and buttonholes.
Even though the quilt was technically complete when the last piece was added, I decided to add additional stitching since most of the pieces were rather large. I also stitched pocket openings closed and stitched over buttonholes because this quilt will get lots of wear. (Besides, it was so warm and cozy sitting underneath it in December, I was thoroughly enjoying the stitching.) This quilt is completely stitched by hand and was also completed in less than a month!
detail of front
detail of back
A dry day in January, and a walk with a friend to the Dungeness River Nature Center, was a perfect photo opportunity.
Quilt details:
Cozy wagga
47″ x 67″
hand pieced
hand quilted
upcycled fabrics and wool batting
Many thanks for Tara for the workshop and sewalong inspiration! I thoroughly enjoyed using different materials and methods to create personal, utilitarian quilts.
After seeing all of the temperature quilts appearing on Instagram, I couldn’t resist joining in on the fun. I love these daily projects that slowly accumulate over the course of a year. Both of my squircle quilts were made in this fashion.
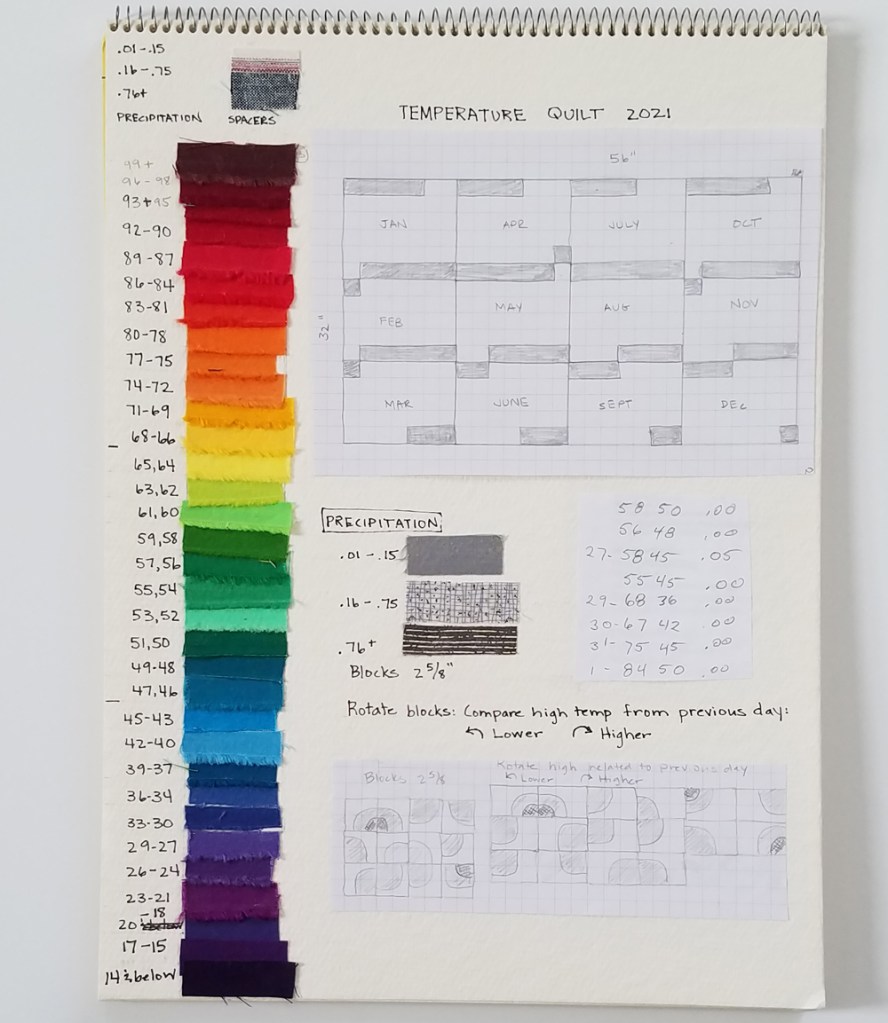
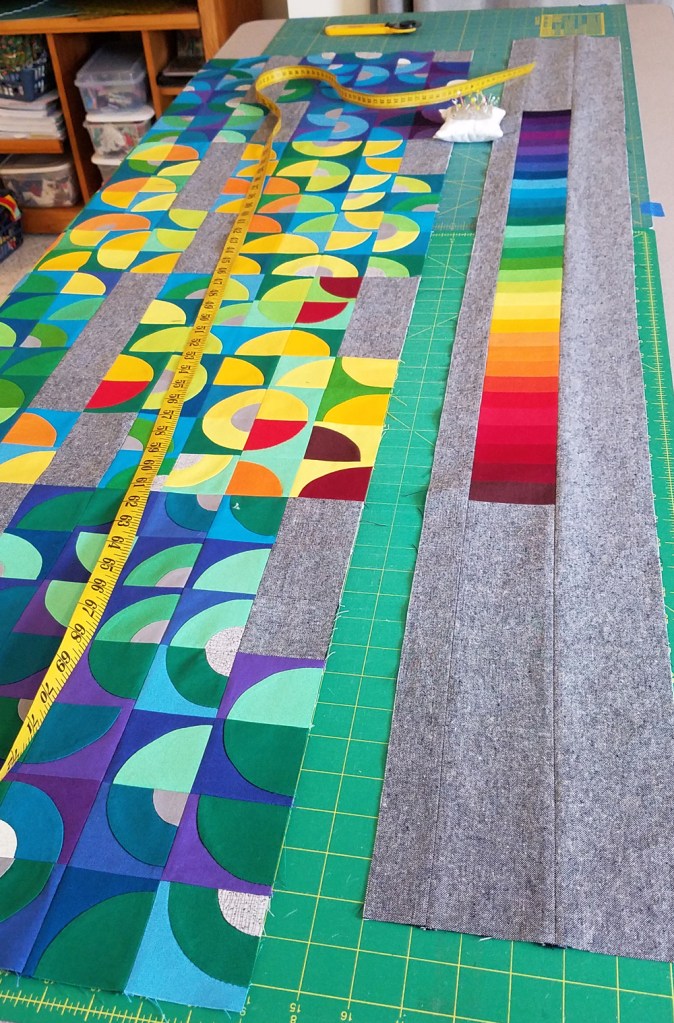
Our weather is rather mild here in Sequim, so when I made my key, I chose to do 3 degree intervals except for our most frequent range where I used 2 degree intervals. Despite living in Western Washington, our weather is drier due to the rain shadow effect from the Olympic Mountains. A neighborhood weather station on Weather Underground gave me a very local source of data. Each morning, my husband recorded the data for me, making it a collaborative effort.
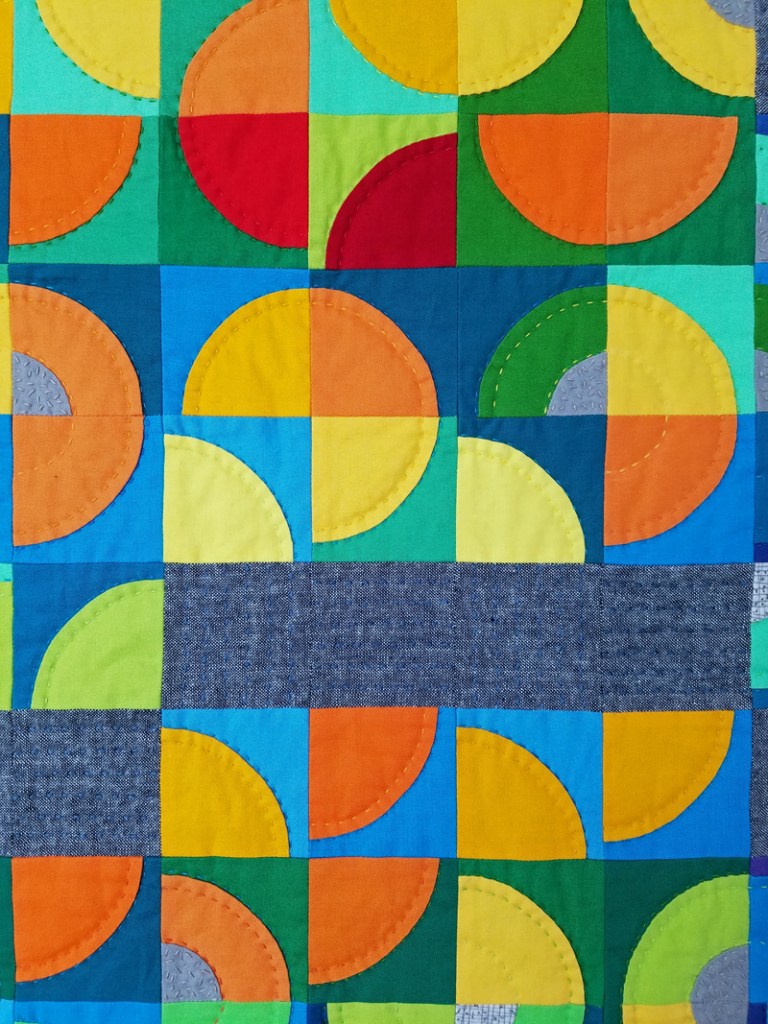
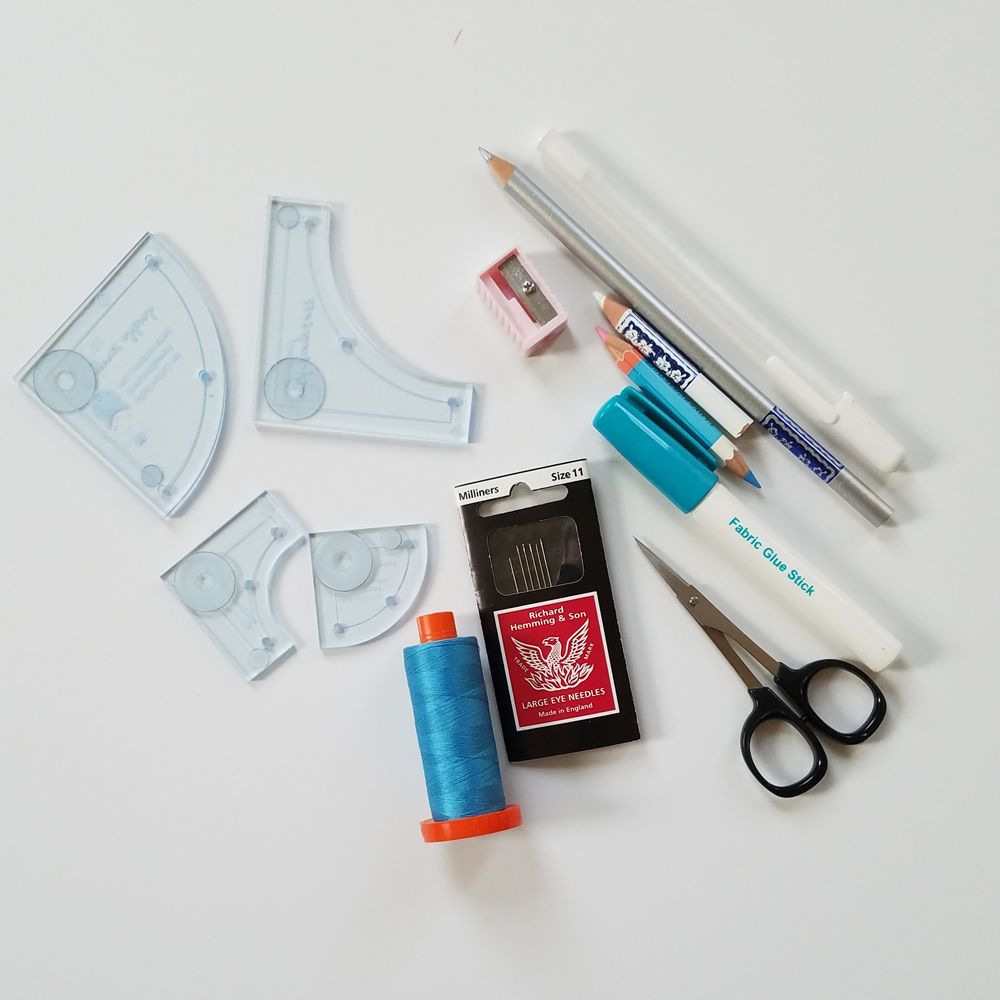
I used my quarter circle templates from Jen Carlton Bailly for the daily units. The convex shape represents the highs, the concave the lows and the smaller curve shows the amount of precipitation. I traced all of the shapes, cut them out with scissors and pieced them by hand. To provide movement to the design, the blocks are rotated based on their relationship to the previous day’s high temperature.
A calendar layout makes it easy to find specific dates. The blocks were assembled by machine each month allowing me to take them down and free up space on the design wall. On January 1st, I had all the blocks assembled.
And then it stalled. I couldn’t decided where to put the key, how to do the borders, etc. Finally this weekend I dedicated some time to do the work I’d been avoiding and I now have a finished top!
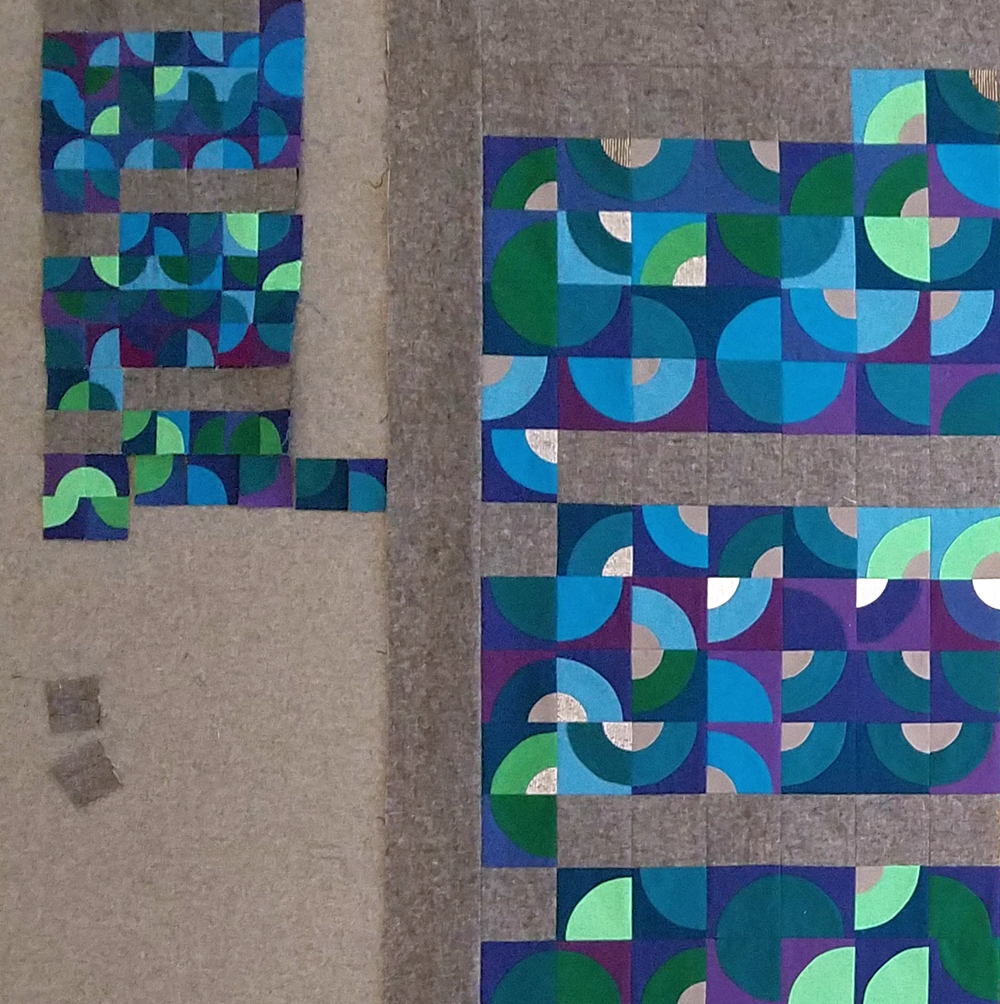
Postscript: I had a lot of scraps from the concave pieces that were just the right size to do a smaller version for 2022. I’m using the same rules as last year without the precipitation component. These units finish at one inch and are pretty cute if I do say so myself. Here’s a photo for size comparison.
It’s been just over a year since my last post and there are a few projects I would like to document here. First up is Tiny Bubbles which began in August 2020 with a sew along hosted by Leslie Tucker Jenison and Michele Muska. We used Jen Carlton Bailly‘s smallest template to create tiny quarter circle units which Jen calls “curvelets”. Each unit finishes at one inch.
With no plan in mind, I liked the idea of hand piecing little blocks from my overflowing scrap bin. (Note to self: if you want to use up scraps, making little units is not a terribly efficient way to do so!) It was the first summer of the pandemic and I enjoyed tuning into the weekly Instagram Live chats with Leslie and Michelle. My process was to make a few units each day, watching them accumulate on the design wall.
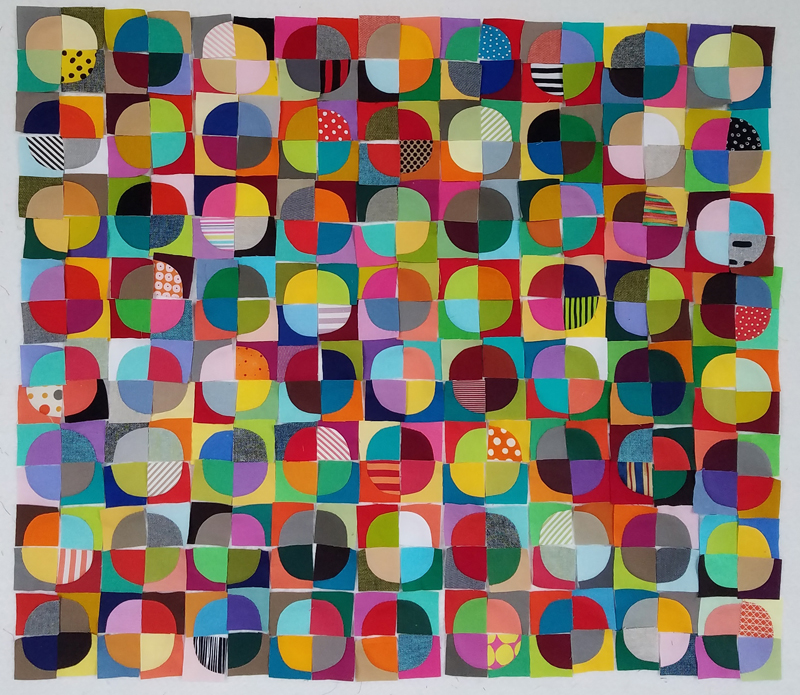
At the end of the sew along, I began piecing the curvelets into 4 1/2 inch blocks, forming four circles made up of 16 units. I decided to assemble by machine because I’m not THAT crazy and I still wanted to see how large I could make the final piece before losing interest.
As you can see from this photo, there is some serious shrinkage going on here. The assembly required lots of pinning and careful piecing. Each day I continued to add more curvelets to the collection.
Life continued on in this way until June, 2021, when Jenn McMillan hosted the #100daysummersewalong to encourage any handwork project. I decided to participate and add one 4 1/2″ block a day consisting of four 2 1/2″ quarter circle units. During this time, I continued to assemble the smaller units into blocks.
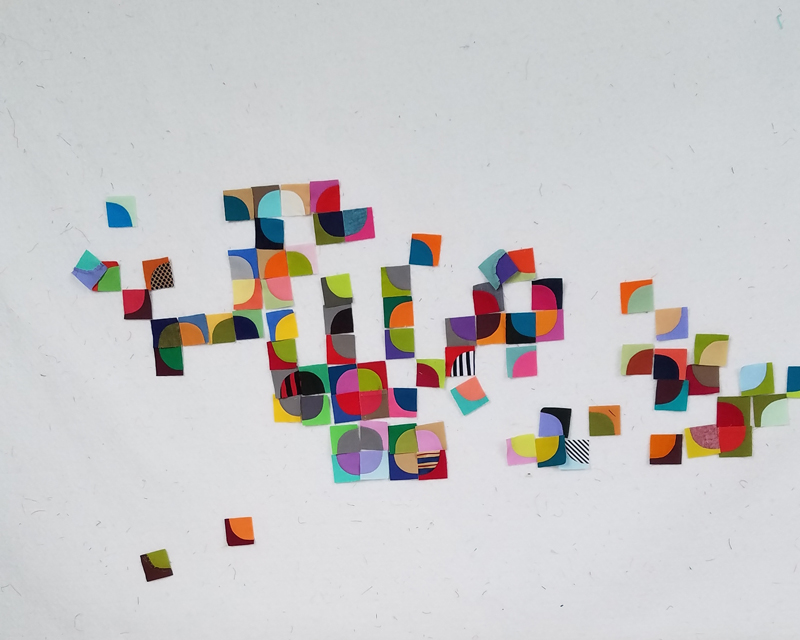
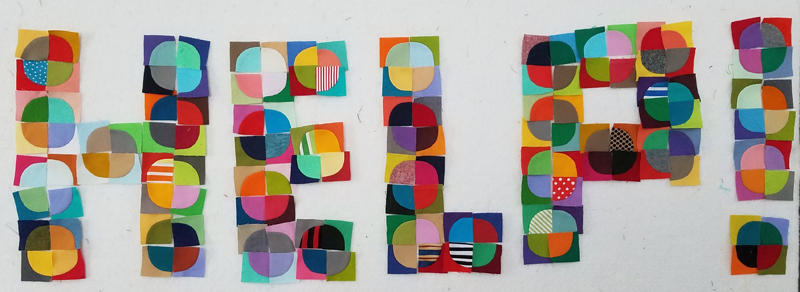
One morning I came into the studio and the wind had blown over my portable design wall. My friend, Sarah Hibbert @quiltscornerstone thought it looked like they were trying to say something. I decided to put them back on the board and spelled out this “HELP” message. (It’s been a long two years of trying to entertain myself, what can I say?!)
At the end of the summer I decided it was time to reassess and come up with a plan. Looking back at my photos, it looks like I rearranged and added more blocks for about a month before I actually completed the top. Those poor little blocks were about worn out from all the action!
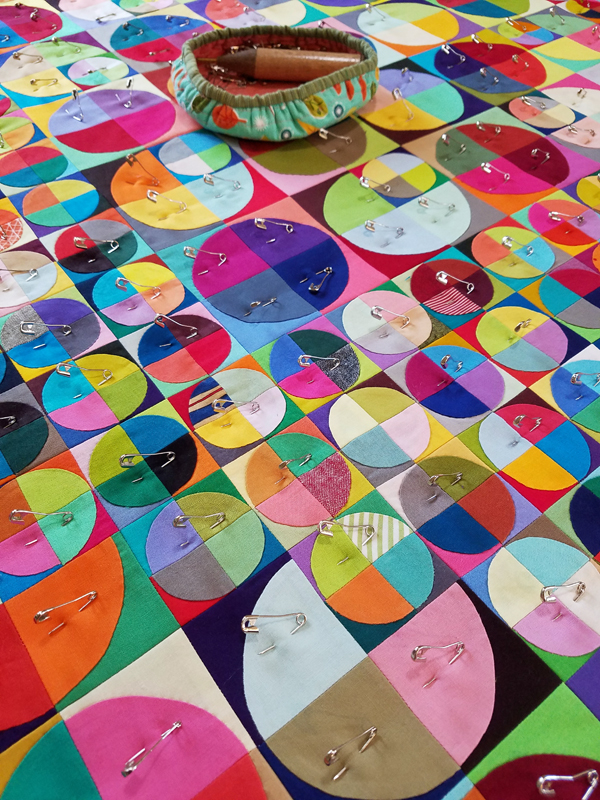
Basting time! I used a gray peppered cotton for the backing which is nice for allowing the quilting to show.
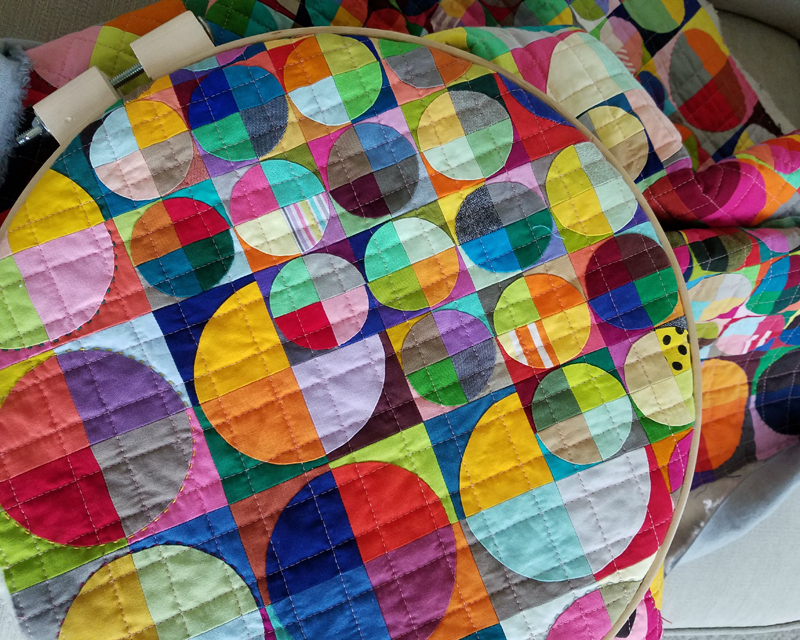
A straight line grid was quilted using the walking foot on my domestic machine. Then I hand quilted around the larger units using perle cotton thread.
Tiny Bubbles was accepted into QuiltCon 2022 in Phoenix and I am happy that people will be able to see it in person to appreciate the scale of the small units. This is the description that I sent with my entry:
Quilted during the pandemic, these tiny bubbles kept me occupied while isolated in my own small bubble. All of the quarter circles were traced from templates, cut with scissors and pieced by hand. The curved units were then assembled by machine.