The first week of the new year began with getting a couple of quilts prepared for QuiltCon East in Savannah and getting them shipped. I am very excited to have two quilts juried into the show this year.
The first one is titled “jubilant” and it is entered in the Small category.
“jubilant” (28″ x 30″) hand dyed cottons, Essex yarn dyed linen, matchstick quilting
The second quilt is called “Trestle Nestle” and it is entered in the Handwork category.
Trestle Nestle (56″ x 51″) hand quilted, white linen and Kona solids
The shapes for this quilt were inspired by a local trestle on a trail where I enjoy walking and cycling.
Railroad Bridge trestle on the Olympic Discovery Trail, Sequim, Washington
Sleeves and labels were attached, and instructions printed.
It always seems to take me longer than I expect to prepare for shipping! The first hurdle is finding a box the correct size. In the past, I have been happy with a box that I was able to purchase at the UPS store, but they didn’t have any in stock this time around. (The recommendation by shows is that you put the quilts in a new box because boxes can become weakened when used.) Since I wasn’t able to locate a new box, I ended up reusing a box, but I reinforced it with a LOT of packing tape.
Then there is the plastic bag to keep your quilt safe from the elements. Recently, I have been using XLarge Ziploc® bags. They are sturdy, reusable and measure 2 ft x 1.7 ft.
It always makes me a little nervous when I drop that package off at the post office. I sent it with a signature required, so I will be tracking it today and making sure it arrived safely!
It won’t be long before I will need to get myself ready to travel to Savannah.
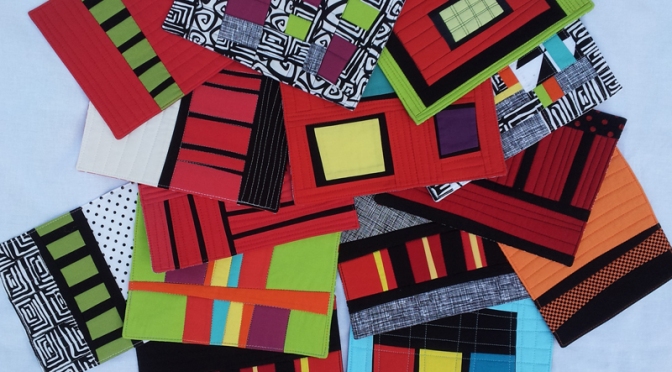
A confession…I love leftovers, both food and fabric! They give me an opportunity to be creative, I feel virtuous for not being wasteful and sometimes they even save me a little time.
Here are a few recent finishes that began as orphan blocks, trimmings or bits and pieces floating around the scrap bin and design wall.
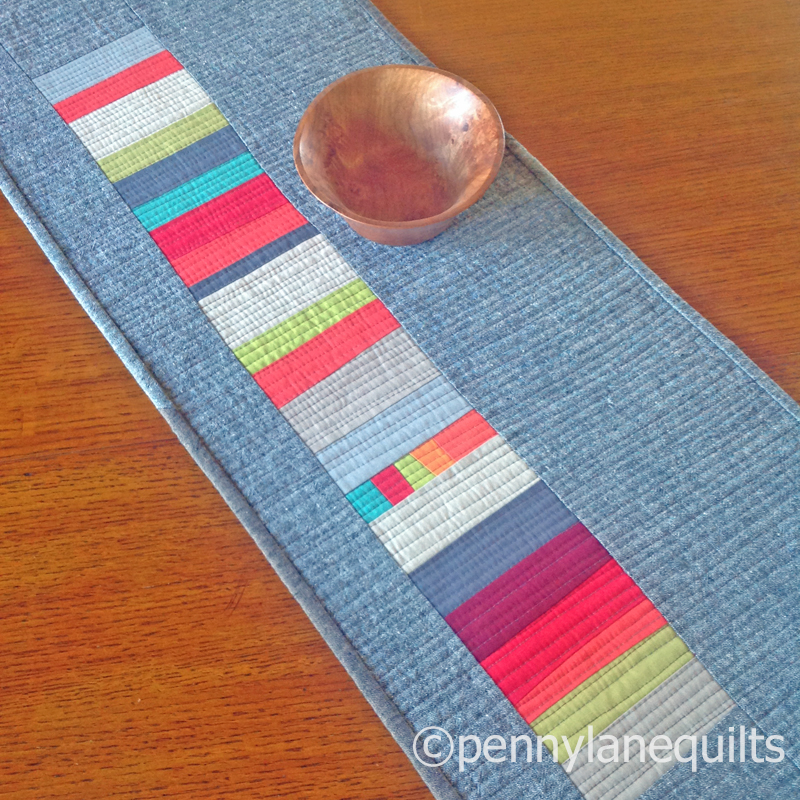
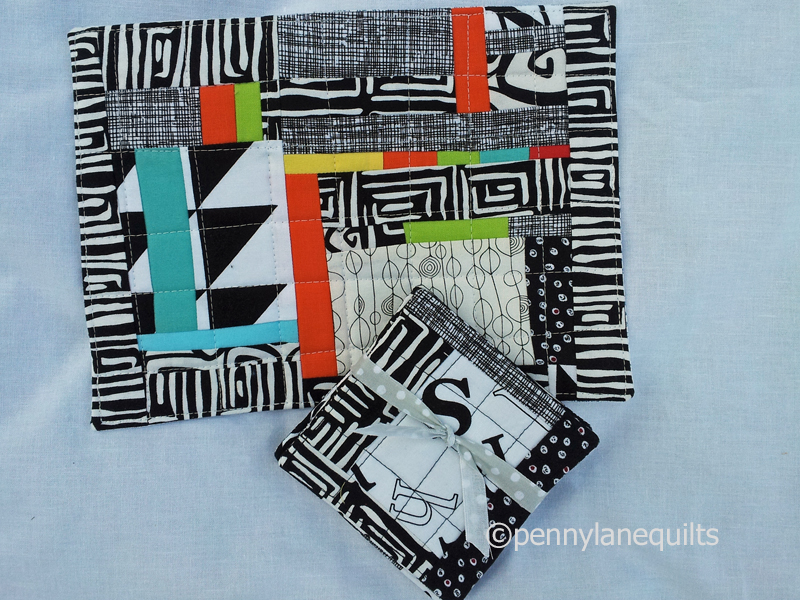
Some leftover strips became a table runner.
Essex yarn dyed linen + commercial solids for the stripes
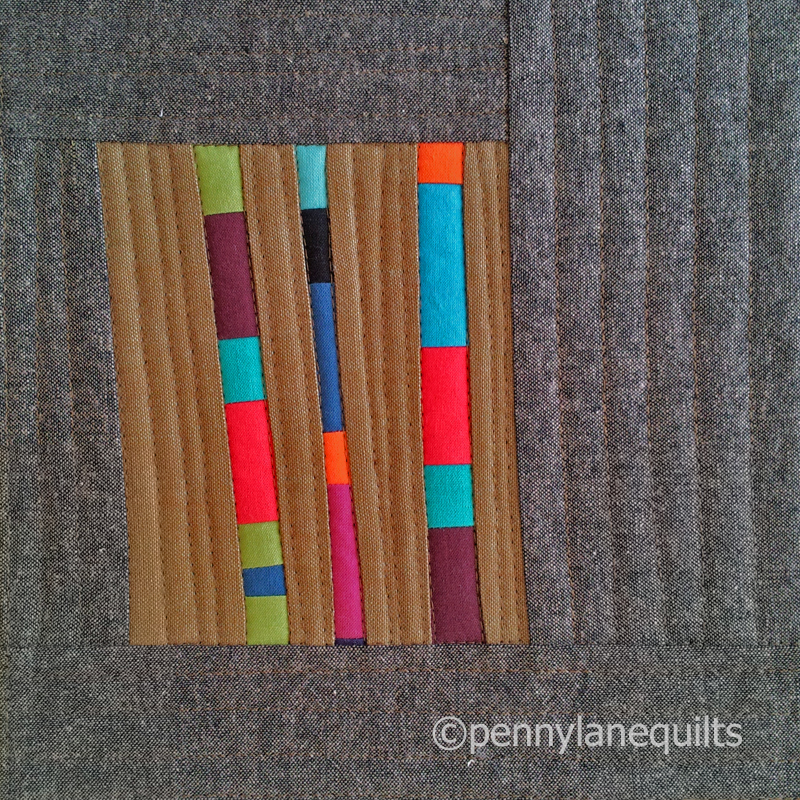
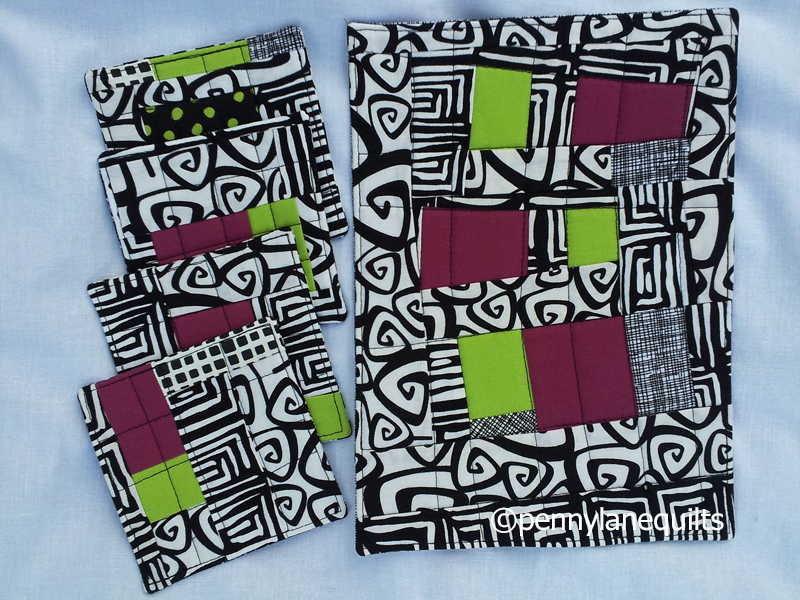
A few orphan blocks became a pillow and a table mat.
And sometimes everything “clicks” and a few units that have been marinating for a long while are the impetus for something that keeps me exploring, and revising, and reworking until it makes me very happy!
“jubilant”, hand dyed cottons, Essex yarn dyed linen, matchstick quilting
So, the moral of the story is… save all those leftover bits because you never know when they will be just what you need to get your next project started!
(The table runner and place mats in the featured image began as some odds and ends from the recent Riley Blake challenge.)
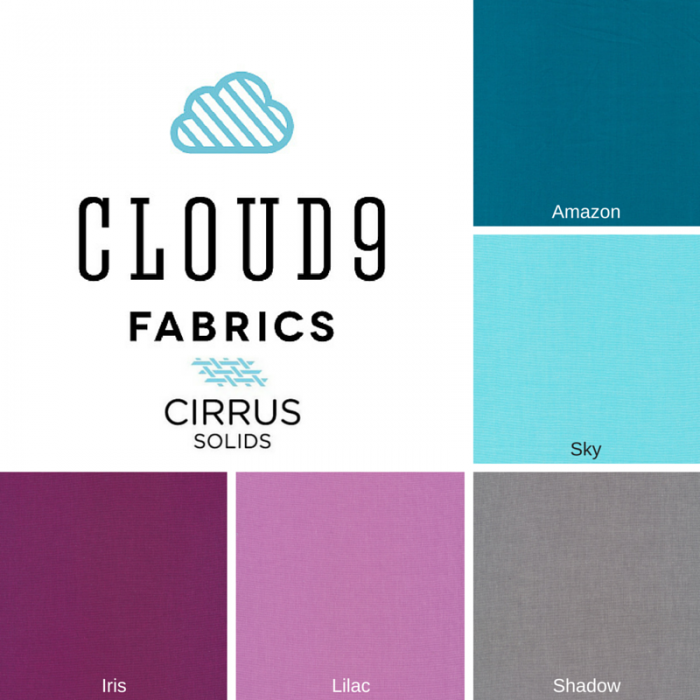
Welcome to the second day of the 2016 Cloud9 New Block Blog Hop!
It is so exciting to be part of the block hop, sponsored by Cloud9, and hosted by Yvonne of Quilting Jetgirl, Cheryl of Meadow Mist Designs and Stephanie of Late Night Quilter! There are almost 70 bloggers designing blocks using the fat quarter bundle of lovely organic Cirrus Solids generously provided by Cloud9 fabrics. The hosts chose this palette for the hop, called “Berry Harvest”. I decided to use four of the colors, leaving “Lilac” out this time around.
My block, Woven Berry Basket, is an improvisational block based on the traditional basket weave design. It uses a free form cutting technique (a.k.a cutting without a ruler).
The goal of this tutorial is to introduce you to this technique. There are two main principles that I use in improv piecing:
if it is too short, add on
if it is too long, cut it off
Your block will not be exactly like mine, but I will describe a process that you can use to make one that is similar in design.
Tips for improv piecing:
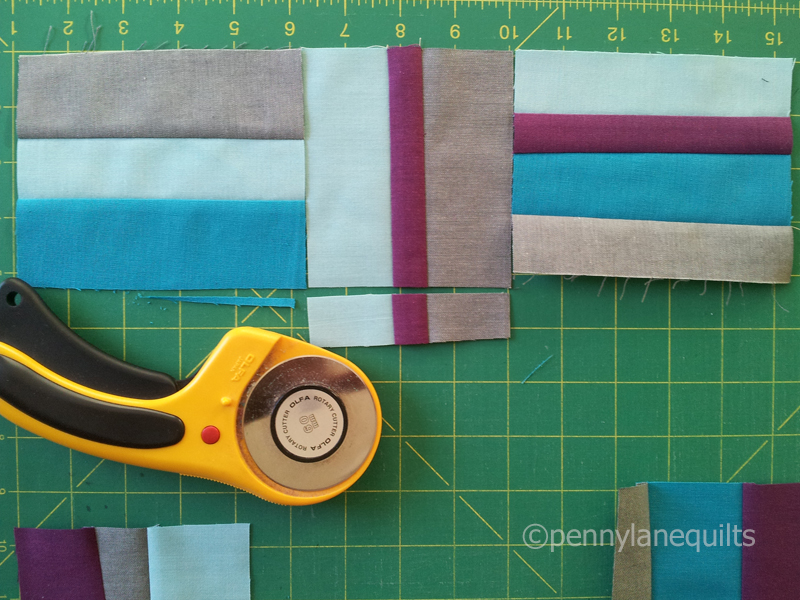
A rotary cutter with a 60mm blade is my preference for free form cutting
Set the stitch length on your machine a little shorter than usual
Cut 4 strips 5 in x 18 in (approx) Here’s your first chance to cut without the ruler!
free hand cut the equivalent of 4 strips approx 5 x 18 (notice the cut is straight-ish)
2. Free hand cross cut strips that vary from about 1 in – 2 .25 in width from each strip
I like to cut each strip individually, some are slightly angled, but most are straightish
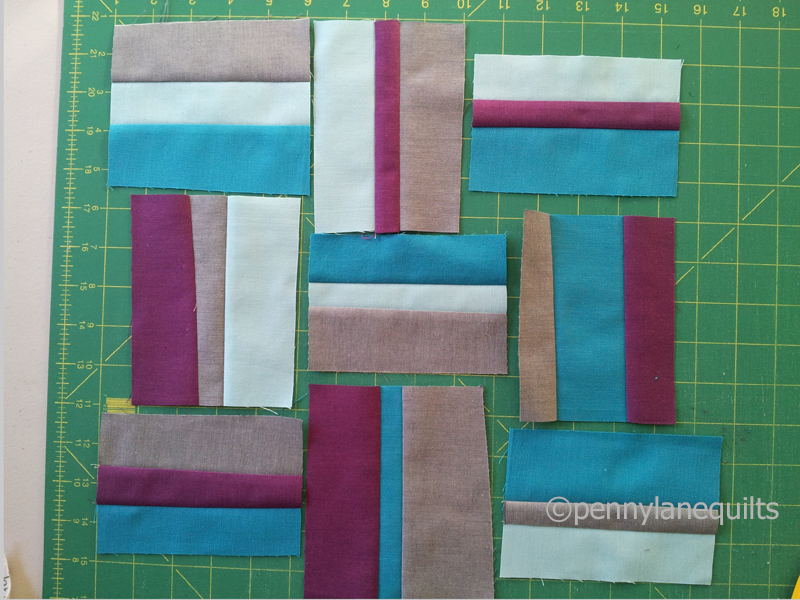
3. Stitch 9 pairs of strips together, varying the colors and widths.
chain piece 9 sets of strips, no need for pins, just go slowly and align the edges as you go
4. Press seams to the darker fabric
variety of widths and color combinations
5. Add a third strip to each set, again varying the color placement and width of strips.
6. Lay out the 9 units in an alternating vertical, horizontal pattern.
To end up with a 12.5 unfinished block, we will aim to have each unit be at least 4.5 in on each side before assembling. (I trimmed the ends to even up the units.)
*At this point, you will need to start making decisions based on how your units are sized. I will attempt to describe how I solved the puzzle.
For the first row, I decided to cut the bottom off the middle unit, and add a strip to the third unit.
If it’s too long, cut it off and if it’s too short, add on!
I followed the same procedure for the second row:
a strip added to the middle unit
But when the units were assembled, the second row was shorter than the first, and I was aiming to have each row approx 13 in wide so that I would be able to trim it down to 12.5 in. What to do? Add on!
I used the cutting mat measurements to see if the overall width was about 13 inches
To assemble the rows, I trimmed the top edge of the second row, then overlapped it onto the bottom of the first row (right sides facing up). Using that cut edge as my guide, I trimmed the bottom of the top row to match.
*use the ruler to stabilize the edge, but do not use it as a cutting edge
Follow the above procedures to assemble the third row and attach.
Can you see how I am cutting along the edge of the row, not along the ruler edge?
If your block is big enough, just trim to 12.5 in square and your block is complete. If it is too small, improvise! You might add some strips to form a frame, and then trim.
Success! Trim to 12.5 inches and you’re finished.
Here is my finished block:The thing I like best about improvisational work is that you are engaged making design decisions throughout the process. *Warning: this may be addictive! As I work, I find myself asking lots of “What if?” questions:
What if I cut the strips wider (or thinner)?
What if I used 5 colors?
What if I only used 2 colors?
What if it was scrappy?
What if the units were smaller and I made a 4 x 4 grid?
I hope you will give this a try, and that you will enjoy the process as much as I do. If you make a block, I’d love to see it! For those on Instagram, tag your photo @pennylanequilts and use the hashtag #wovenberrybasket.
Thanks for stopping by! I’d love to hear your thoughts and answer any questions you may have.
And don’t forget to enter the Giveaways! Visit each of our wonderful hosts for the chance to win 3 separate fat quarter bundles of beautiful Cloud9 Cirrus Solids.
Be sure to check out the rest of the stops on the hop. You’ll be glad you did!
The past couple of weeks have found me busy creating inventory for an upcoming studio tour. For those of you in the area, it is the annual Port Townsend Studio Tour , and I will be located at the Egg & I Pottery studio in Chimacum, thanks to my talented friend, Diana Cronin. For more information about the tour and to see Diana’s colorful ceramic pottery check out the links.
I thought it would be fun to have some items that would coordinate with Diana’s pottery, so I have been busy making coasters and mug rugs.
I played with bright scraps of fabric and improvisational piecing to create these colorful accents for the home. Some improv, straight line quilting was added for the finish.
If you have been thinking about trying some improvisational piecing, or if your scrap box is overflowing, you might want to give a small project a try.
Now I’m off to work a little bigger and make place mats. With any luck, I’ll have those to share by the end of the week. Hope you have time to play this week, too!